Look, nobody NEEDS a gym. Not really. When you’re trying to build a better body, tone up, or lose flab, having a facility with a variety of equipment certainly helps, but it isn’t a must. You can get in enviable, even jaw-dropping shape with a few light weights, a suspension trainer, or even your bodyweight alone, if that’s all you’ve got. (And if you don’t believe us, visit your local penitentiary, and get a look at the bodies you see in there.)
Our number-one suggestion for anyone training at home: do full-body workouts. First, read up on the advantages of full-body training below, and then see four of our favorite routines for getting in shape, whether you have minimal equipment (such as a single light dumbbell or kettlebell, or a suspension trainer), or your bodyweight only.
Why Should You Work Out Your Whole Body?
Working the whole body in one session offers three big advantages over body-part workouts. For one thing, it ensures that you train the entire body evenly. You can’t neglect any one muscle group, or simply forget to do it for a week (ahem, like leg day). For another, working all your muscles together ramps up the calorie-burning effect, and trains your heart, so that you can maximize fat loss in your workouts and get aerobic benefits as well. A study in BioMed Research International found that subjects who performed just three 30-minute, full-body circuit-training sessions per week lost fat and improved their resting heart rates and blood pressure.
Lastly, hitting every muscle in one workout can lead to faster muscle gains for each body part. One reason why is that the volume you do per muscle group must be kept low. Think about it: if you do five or more sets of squats, how could you also fit in rows, presses, curls, pushdowns, hip bridges, etc., within a reasonable period of time? To avoid a marathon workout session, you simply have to cut back your volume. At first, reducing the workload for a muscle may sound like a liability, but it’s actually an advantage. Because you can’t do a lot of volume for one muscle in a single session, you can be sure it will recover again quickly. That means you can train it again sooner. For example, if you do three sets of squats on Monday, you could do two sets of lunges on Wednesday, and then maybe four sets of stepups on Friday. It may not seem like a lot of leg work in each training session, but that’s nine total sets for the quads alone inside of one week. Provided you can recover from your workouts, the more frequently you train, the faster you can build muscle. A study in the Journal of Strength and Conditioning Research found that subjects who trained the whole body three days per week gained more arm muscle than another group that trained each muscle group just once (a standard body-part split).
“Full-body training is the most efficient way to stimulate and develop your major muscle groups,” says Chad Waterbury, PT, DPT, an LA-based physical therapist and trainer to celebrities and pro athletes (@drchadwaterbury on Instagram). “Due to the greater metabolic demand, it’s terrific for improving body composition.” To show you how to set up your own total-body training days, Waterbury wrote the four workouts that appear below.
How Often Can You Do A Full-Body Workout?
Full-body workouts can and should be done frequently to take advantage of the fast recovery. Just how frequently you train depends on how hard you want to go and how much work you want to do. If you’re limited to using your body weight alone, you could conceivably train six or even seven days a week, doing one or two all-out sets of basic bodyweight exercises. Pushups, split squats, and chinups aren’t very hard to recover from, so, generally speaking, you can do them often. However, if you have weights, particularly heavy weights, you may need more recovery time before working one or more body parts again.
In general, three to four workouts per week on non-consecutive days is a good schedule. For example, you could perform all four of the workouts shown here in one week if you liked (Monday, Wednesday, Friday, and Sunday), or, you can repeat one that suits you best for three to four sessions a week. If you can improve your performance by some measure each time you repeat a workout (such as by adding reps, adding weight, or reducing the rest periods), you can be sure you’re recovering well enough to make progress. If you can’t, you should ramp up your recovery efforts (sleep, nutrition, etc.), or consider training less frequently.
How To Work Out At Home Without Weights
If you don’t have access to weights at home, you’ll have to make the most of your bodyweight, and a suspension trainer makes that easy to do. It allows you to position your body at certain angles so that your arms or legs can take on more or less of your weight, as much as is appropriate, to make the exercises you’re doing effective. For most suspension exercises, the more directly you position yourself under the trainer’s anchor point, the more challenging the exercise will be. On an inverted row, for instance, you can make the movement harder by walking your feet forward so that your body is more parallel to the floor under the anchor point. To make it easier, walk your feet back further so that you’re rowing from a steeper angle.
Look for a trainer that has foot cradles in addition to handles, so that it can support your feet for a variety of leg exercises and pushup movements. The TRX and Jungle Gym XT are both good options. If you can’t get a hold of a suspension trainer, however, hope is not lost. We’ll introduce you to an exercise in the bodyweight workout below that requires absolutely nothing but a floor to work your back muscles hard.
How To Stretch and Warm Up Before A Full-Body Workout
Use the following mobility drills to warm up and mobilize before any full-body routine. They focus on commonly tight and injury-prone areas, such as the thoracic spine, hips, and shoulders. Perform 2–3 sets of 5–10 reps for each move.
Egyptian
Kneeling Arm Thread
Kneeling King Dancer
Shinbox Switch
The Best Full-Body Workouts At Home
Full-Body Workout #1 – Suspension Trainer and Bodyweight
Perform the exercises in circuit fashion, completing one set of each move in order. Do as many reps as possible for each lift. Rest 45 seconds between exercises, and then repeat the circuit for 4–5 total rounds.
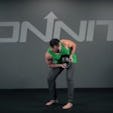
For exercises 1A, 1B, and 1C, you’ll use a suspension trainer (Onnit Suspension Rings, a TRX, or any other model are all OK, as long as the trainer has foot cradles). Find an angle that you’re sure will allow you to perform 8–15 reps, and use it consistently over the next few weeks so that you can gauge your progress. If you can perform more reps at the same angle, you know you’ve gotten stronger.
You may be able to use the same handle height for each exercise, if you set the handles at about knee level.
1A Inverted Row on Suspension Trainer
Step 1. Grasp the handles with your palms facing down, and hang from the suspension trainer at whatever angle is appropriate for you (just make sure there’s tension on the straps). Brace your abs and draw your shoulders back and down—think “proud chest.” Retract your neck, as if making a double chin, so your body forms a straight line from your head to your feet.
Step 2. Row your body up to the handles, tucking your elbows close to your sides, and rotating the handles so that your palms face each other.
1B Pushup To Pike on Suspension Trainer
Step 1. Sit on the floor and place one foot at a time in the foot cradles of the suspension trainer. Get into a pushup position, and tuck your pelvis so that it’s perpendicular to the floor. Your hands should be directly under your shoulders, and your body should form a straight line from your head to your (suspended) feet.
Step 2. Lower your body until you feel a stretch in your chest, tucking your elbows near your sides. From there, press your body back up.
Step 3. Continue pushing your hands into the floor as you bend your hips and drive your butt toward the ceiling, piking your body up as high as you can and squeezing your abs. That’s one rep.
1C Single-Leg Hip Bridge on Suspension Trainer
Step 1. Set one handle of the trainer to about knee height and lie on your back on the floor. Place the foot of your weaker leg in the foot cradle of the trainer, and bend the hip and knee of the other leg 90 degrees. Tuck your pelvis slightly so that it’s perpendicular to the floor, and brace your core.
Step 2. Drive through your heel to raise your hips off the floor. Keep your core tight so that you don’t hyperextend your lower back. Complete your reps, and then repeat on the opposite leg.
1D Skater Squat
Step 1. Set a towel, or stack mats, on the floor behind you, and stand on the foot of your weaker leg. Reach your arms out in front of you to help you balance.
Step 2. Begin bending your hips and the knee of the support leg while reaching back with your free leg. Continue squatting down until your rear knee touches the mats, but don’t rest on it. (Do not let your toes touch down.) Drive up through the middle of your foot and return to standing. Complete your reps, and then repeat on the opposite leg.
If you’re new to skater squats, or don’t have much experience with single-leg training, elevate the towel or pad as needed so that you shorten the range of motion. You can gradually progress to touching the floor with your knee.
Full-Body Workout #2 – 1 Dumbbell or Kettlebell
This workout is ideal if you’re stuck somewhere that offers only one modestly-weighted dumbbell or kettlebell—such as the rusty 20-pounder Uncle Elmer has been using as a doorstop for as long as you can remember. The weight (or lack thereof) doesn’t matter much if you keep the pace brisk and add some instability to the exercise, by working one side at a time and fighting for balance.
Perform the exercises in circuit fashion, completing one set of each move in order. Do as many reps as you can for each exercise. Rest 45 seconds between exercises, and then repeat the circuit for 4–5 total rounds.
1A Single-Leg Bent-Over DB/KB Row
Step 1. Hold a dumbbell or kettlebell in your weaker hand and rest your other hand on a table, chair, or other sturdy surface. Stand on the leg that’s the same side as the one that’s touching the table, and bend your knee slightly. Bend your hips back until your torso is roughly parallel to the floor and extend your free leg behind you. Your head, spine, and pelvis should form a straight line, and your core must be braced.
Step 2. Row the weight to your side, avoiding twisting your body in any direction. Complete your reps, and then repeat on the opposite side.
1B Split-Stance One-Arm Push Press
Step 1. Stand with your legs staggered, and hold the weight in your weaker hand at shoulder level. Tuck your pelvis slightly so that it’s parallel to the floor, and brace your core.
Step 2. Dip both knees quickly and use the rebound effect to help you press the weight overhead with momentum. Avoid bending or twisting in any direction. Complete your reps, and then repeat on the opposite side, switching your legs as well.
1C Offset Reverse Lunge
Step 1. Hold the weight in your weaker hand at shoulder level. Brace your core.
Step 2. Step back with the leg that’s on the same side as the weight, and lower your body until your rear knee nearly touches the floor and your front thigh is parallel to the floor. Avoid bending or twisting. Complete your reps, and then repeat on the opposite side.
1D Single-Leg RDL
Step 1. Stand on your weaker leg and hold the weight at arm’s length on the opposite side. Take a deep breath into your belly, and brace your core.
Step 2. Bend your hips back, allowing your support leg to bend as needed, while keeping your head, spine, and pelvis in a straight line. Continue until you feel a stretch in your hamstring. Avoid bending or twisting. Complete your reps, and then repeat on the opposite side.
1E One-Arm Floor Press
Step 1. Lie on your back on the floor, holding the weight in your weaker hand over your chest. Spread your feet wider than your shoulders and dig them into the floor. Tuck your pelvis slightly so that it’s perpendicular to the floor. Take a deep breath into you belly, and brace your core.
Step 2. Lower the weight until your triceps touch the floor and pause for a moment. Press back up. Complete your reps, and then repeat on the opposite side.
Full-Body Workout #3 – Resistance Bands and Bodyweight
The workout requires the use of two bands—one long, and one short (a mini band, if possible). Bands are easy to acquire, safe to use, and can provide variable amounts of resistance. Need them to feel heavier? Choke up on the band. Lighter? give it more slack. Bands are also great for giving you feedback. On exercises such as the fire hydrant and frog pump, the tension of the band will remind you to keep your glutes engaged constantly. This not only compensates for your not being able to use heavy weight, it will teach you to mentally connect with muscles you’ve neglected. Becoming more aware of a muscle and how it works will help you fire it even harder for better results.
The exercises are grouped into two circuits. Perform the exercises in the first circuit (1A–1D), completing one set of each move in order. Rest 30 seconds between exercises, and then repeat the circuit for 4–5 total rounds. Go on to exercises 2A–2C, and perform them in the same fashion.
1A Banded Face Pull
Reps: 18–20
Step 1. Attach the long band to a sturdy object at about face height. Loop the ends of the band around your wrists, and extend your arms in front of you. Stand back to put tension on the band.
Step 2. Keeping your ribs drawn down and core tight, pull the band toward your face, stopping when your upper back is fully contracted. Do not extend your lower back to help pull the band.
1B Clap Pushup
Reps: As many as possible
Step 1. Get into pushup position and tuck your pelvis so that it’s perpendicular to the floor. Your hands should be directly under your shoulders, and your body should form a straight line from your head to your feet.
Step 2. Quickly lower your body until your chest is about an inch above the floor, tucking your elbows close to your sides as you descend. Use the rebound effect from the fast descent to come back up as explosively as you can. Come up so fast and high that your hands leave the floor and you can clap your hands in mid air.
1C One-Arm Band Curl
Reps: As many as possible
Step 1. Loop the long band over your left foot and run it under your right foot. Now grasp the free end in your right hand and stand tall. (Note that if your left arm is weaker, reverse the setup.)
Step 2. Curl the band up without letting your elbow drift forward. Complete your reps, and then repeat on the opposite side.
1D One-Arm Banded Triceps Pushdown
Reps: As many as possible
Step 1. Attach the long band to a sturdy object that’s overhead and grasp the free end in your weaker hand. Bend your hips back slightly.
Step 2. Keeping your elbow close to your side, extend your arm and flex your triceps. Complete your reps, and then repeat on the opposite side.
2A Standing Fire Hydrant Hold w/ Band
Reps: Hold 30 seconds (each side)
Step 1. Wrap the short band around your legs, just above the knees, and face a wall, standing a foot and a half back. Touch the wall for support.
Step 2. Draw your ribs down and brace your core. Bend the knee on your weaker leg, and bend your hips back until your torso is about 60 degrees. Raise your free leg out to the side, drive your heel backward to extend your hip fully, and rotate your knee outward. Avoid any rotation at the pelvis, and let the movement come purely from your hip. Hold the position 30 seconds, and then repeat on the opposite side.
2B Frog Pump w/ Band
Reps: As many as possible
Step 1. Lie on your back on the floor and wrap a band around your legs, just above the knees. Bend your knees 90 degrees and bring the soles of your feet together. Drive the backs of your arms into the floor at about 45 degrees to your torso. Tuck your pelvis slightly so that it’s perpendicular to the floor, and brace your core.
Step 2. Drive your knees outward as you push through the outer edges of your feet to raise your hips off the floor. Rise until your glutes are fully contracted.
2C Jump Squat w/ Band
Reps: 10
Step 1. Wrap a band around your legs just above the knees. Stand with feet slightly wider than shoulder width.
Step 2. Quickly bend your hips and knees, throwing your arms back behind you, and descend to about half your normal squat depth. Drive your knees outward against the band the whole time—your knees must be in line with your big toes. Use the rebound effect to jump upward with momentum. Jump as high as you can, and land softly. Begin the next jump immediately.
Full-Body Workout #4 – Bodyweight Only
Isometric holds mean holding the hardest position in an exercise’s range of motion. When you do this, you put the muscle under the greatest amount of tension possible, and that translates to growth. When you follow that with full-range reps, you’ll be amazed at how quickly you can exhaust your muscles with so little exercise volume—and no external load!
Perform the exercises in circuit fashion, completing one set of each move in order. Rest 45 seconds between exercises, and then repeat the circuit for 4–5 total rounds.
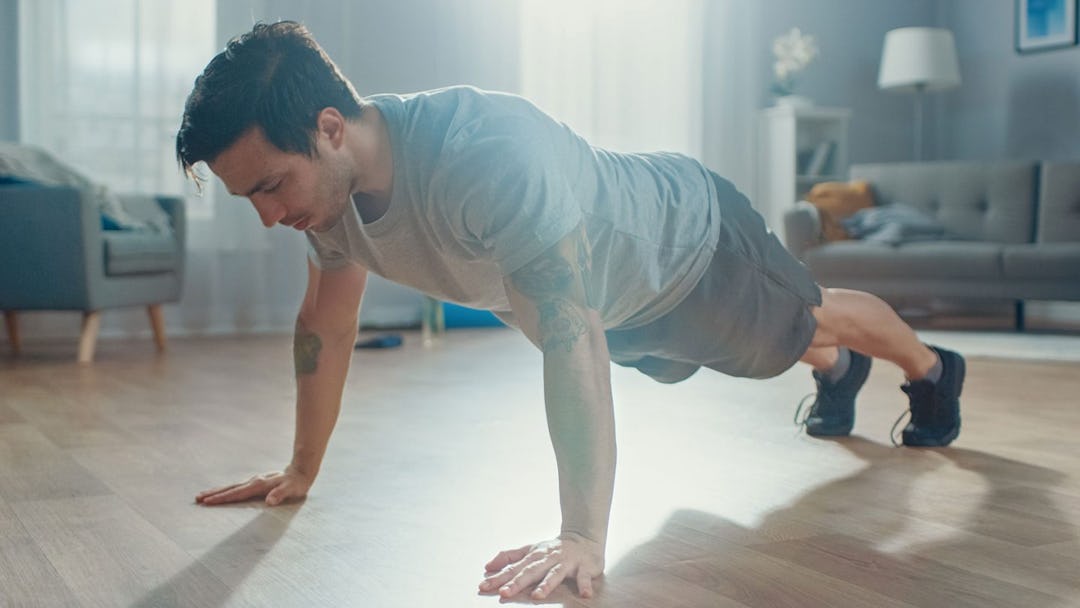
1A Pushup w/ Isometric Hold
Step 1. Get into pushup position and tuck your pelvis so that it’s perpendicular to the floor. Your hands should be directly under your shoulders, and your body should form a straight line from your head to your feet.
Step 2. Lower your body until your chest is about an inch above the floor, tucking your elbows close to your sides as you descend.
Step 3. Squeeze your pecs while actively pulling your arms toward each other—but do not move them. Simply tense your pecs and hold the contraction isometrically for as long as possible.
Step 4. When you can’t hold the position any longer, rest 15 seconds, and then perform as many full-range pushup reps as possible.
1B Three-Position Isometric Row
Step 1. Lie on your back on the floor with knees bent and feet flat on the floor. Extend your arms out 90 degrees to your sides, and then bend your elbows 90 degrees.
Step 2. Drive your elbows into the floor as hard as possible for 10 seconds, as if rowing your bodyweight. Rest 5 seconds, and move your arms toward your body to 45 degrees. Drive your elbows down again for 10 seconds, rest 5, and reposition your arms once more next to your sides. Drive down for 10 seconds, and rest.
1C Isometric Hip Bridge/Leg Curl
Step 1. Lie on your back on the floor with your knees bent 90 degrees and feet on the floor, but allow only your heels to touch down. Tuck your pelvis under slightly, and brace your core.
Step 2. Drive through your heels to raise your hips off the floor, and then dig your heels into the floor as if trying to perform a leg curl. Perform the isometric for 10 seconds.
1D Split Squat w/ Isometric Hold
Step 1. Stand with feet staggered and your weaker leg in front.
Step 2. Lower your body until your front thigh is parallel to the floor and your rear knee is just above the floor. Hold the position while tensing your front leg hard as long as you can. Rest 15 seconds.
Step 3. Now perform normal split squat reps—standing up tall and lowering into the lunge position. Do as many reps as possible.
Step 4. Rest 30 seconds, and then switch sides and repeat the isometric hold, followed by the reps.
)