The chest-supported row is a smart back training exercise for beginner and advanced lifters alike, and it can build your lats while sparing your lower back a lot of irritation. The video and article that follow will show you how to perform it correctly, integrate it into your workouts properly, and get the best results for your efforts.
Key Takeaways:
1. The chest-supported row can spare your lower back while overloading your upper and middle back.
2. It provides an alternative to the classic bent-over barbell row, and may be more appropriate for people who have done bent-over rows for years and reached a plateau, or can no longer perform that movement safely.
3. The chest-supported row can be done with dumbbells and an adjustable bench at home. An alternative is the three-point dumbbell row.
4. When performing it, be sure to avoid arching and bending the spine, not getting a maximum stretch at the bottom of each rep, and putting yourself in an uncomfortable position.
What Is The Chest-Supported Row and What Are Its Benefits?
(See 00:20 in the video above.)
The term chest-supported row refers to any row exercise where your chest rests against a bench. This can be done with a variety of machines, but if you work out at home, you can do it with an adjustable bench and dumbbells. By resting your chest against the pad, you create a very stable position from which to row, and that allows you to lift heavier weight than if you were doing an old-fashioned bent-over row. It will also help you to isolate your middle and upper-back muscles for better gains without being limited by the strength and stability in your lower back.
The chest-supported row is good for keeping your form strict, which can help beginners who need to learn rowing movements, as well as more experienced lifters whose lower backs may be banged up from years of bent-over rows, deadlifts, or squats. In other words, the chest-supported row lets you train the muscles of the mid and upper back without stressing the lower back.
How To Do The Chest-Supported Row: Setup and Instructions
(See 01:00 in the video.)
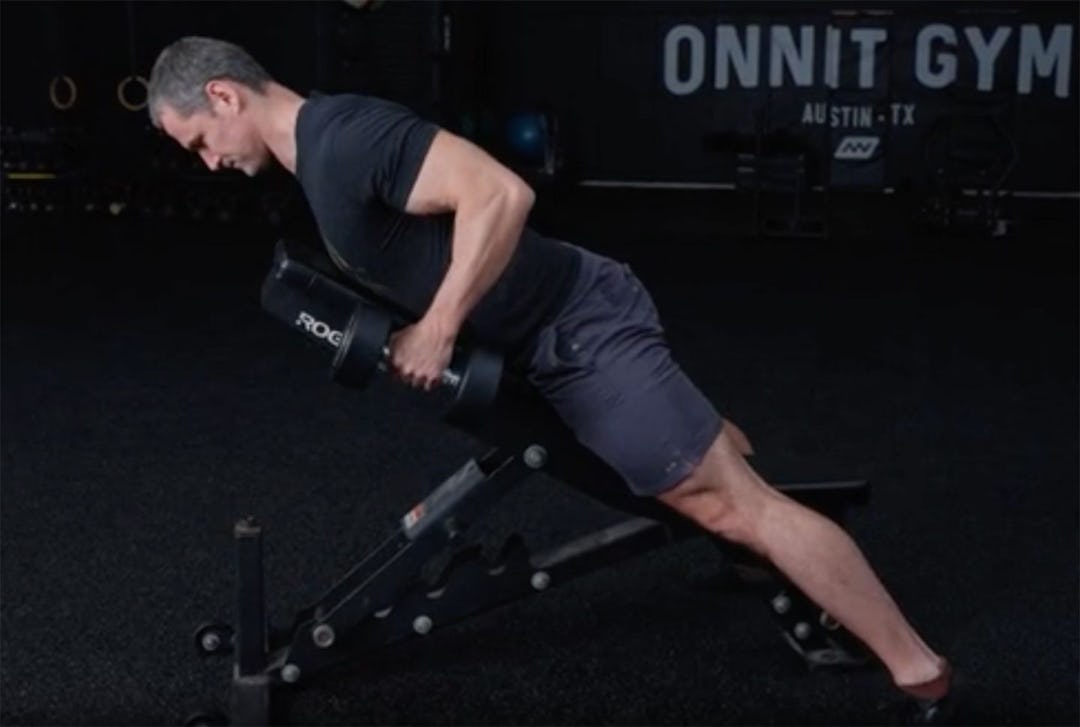
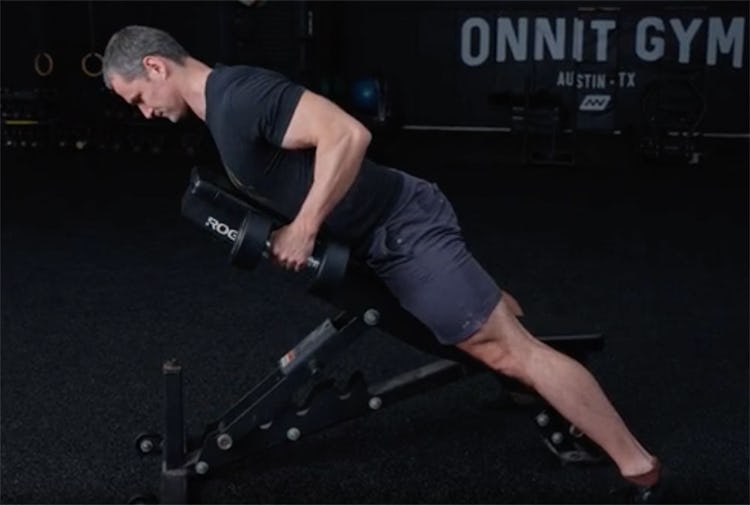
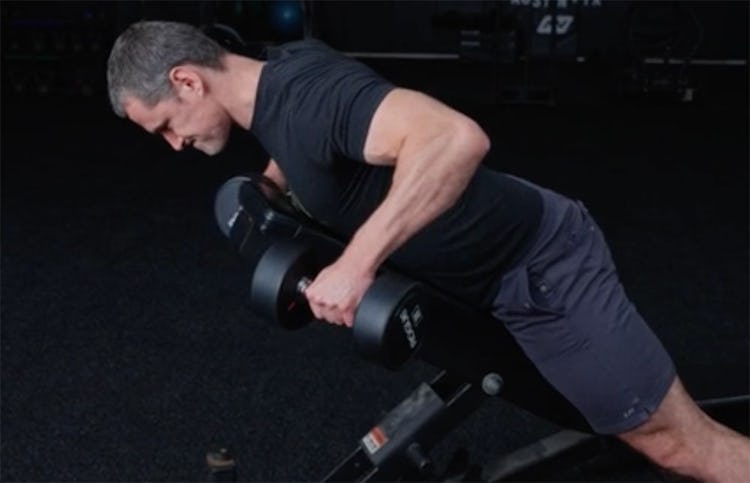
Step 1. Set an adjustable bench to a 30- to 45-degree angle. It really just has to be high enough so that your hands don’t touch the floor when you’re doing the row. Now grasp a pair of dumbbells and straddle the bench.
Step 2. Rest your chest and belly against the bench and let your arms hang. Shorter people may need to stand closer to the head of the bench, while taller ones stand further back, so that when you lie on the bench your head is clear of it. Your legs should be fairly straight and your toes should dig into the floor. Brace your core, and make yourself as stable as possible.
Step 3. Allow your shoulder blades to spread apart so you feel a stretch in your upper back. As you begin the row, drive your shoulder blades back together and downward. Think “proud chest,” and imagine squeezing a pencil or a walnut between your shoulder blades—that’s how tight you should aim to pull them together.
Row the weights back toward your hips with your arms close to your sides until your elbows are bent about 90 degrees and your back is fully contracted.
Step 4. Lower the weights under control and let your shoulders spread apart again. That’s one rep.
What Muscles Does The Chest-Supported Row Work?
(See 02:06 in the video.)
The chest-supported row done with the arms staying close to your sides is going to mainly work the lat muscles, but you can vary the way your back muscles get trained by adjusting the height of the bench and your arm angle. A steeper angle on the bench as well as arms raised 45–60 degrees away from your sides will recruit more of the upper back (trapezius, rhomboids) and rear deltoids.
Of course, as with any row, your biceps and forearms will also get some work.
Pro Tips: How To Avoid Common Mistakes
(See 02:38 in the video.)
Mistake #1
One common mistake on the chest-supported row is arching the back really hard as you row the weight up. When the weight is heavy, or you’re tired at the end of a set, it’s tempting to hyperextend your spine in an effort to get the weight up, but that can hurt your back. If you feel your chest rising off the bench, you’re breaking form.
Keep your core tight and your shoulder blades moving back and down. Your upper torso should stay neutral and supported by the bench.
Mistake #2
Another mistake is not letting your shoulder blades spread at the bottom of the row. You can’t spread the shoulders apart on a bent-over barbell row without losing stability, so you should take advantage of the strong position that the chest-supported row puts you in by getting a stretch in your back muscles at the bottom of every rep. Many coaches and scientists believe that loading muscles in their stretched positions, or emphasizing the stretched position of a rep, provides a growth stimulus all its own.
Let your shoulders protract at the bottom and feel the stretch before you retract them and row. You can even hold this position for a second.
Mistake #3
Lastly, make sure your body is properly supported by the bench. If you position yourself too far forward on the bench, your chest won’t rest on the pad, and your upper body may flop over the edge of the bench. By the same token, if you’re too low on the bench so that your face is rubbing into it, you’ll have a hard time breathing (not to mention, of course, that you’ll look a little ridiculous).
All of your upper body right down to your hips should be supported by the bench at all times. Learn to use the bench for its true purpose—to provide a platform off which you can perform your exercises without having to stabilize any body parts yourself—and you’ll get the best possible results.
Variations of Chest-Supported Rows
(See 04:39 in the video.)
The chest-supported position lends itself to a few other movements that can help your back training.
Kelso Shrug
(See 04:43 in the video.)
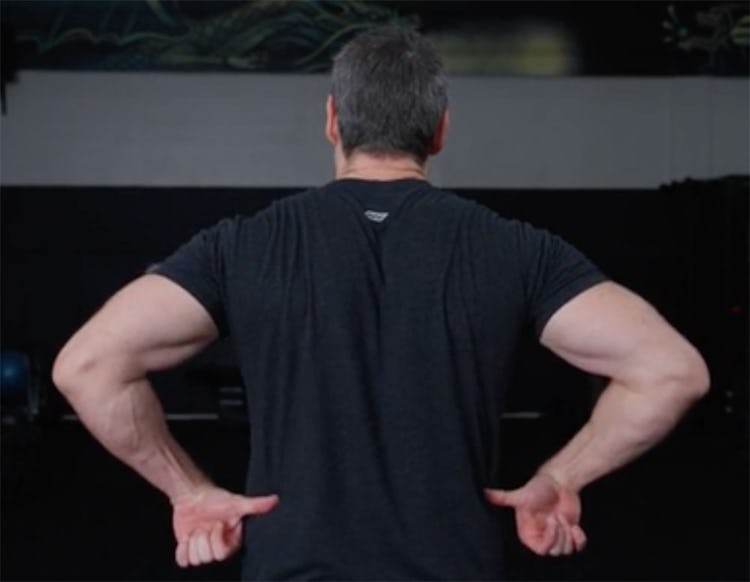
By just retracting your shoulder blades you can focus on the upper back muscles, leaving the lats and the biceps out of it. Called a Kelso shrug, this can strengthen your back for heavier deadlifts as well as give you a thicker appearance front to back, particularly in your traps.
Step 1. Set up on the bench as you would for a chest-supported row.
Step 2. Simply retract your shoulder blades back and downward. You don’t have to fight to keep your arms straight, but don’t bend them to assist—keep the movement purely at your shoulders. Hold the top position for a moment or two.
EZ-Bar Chest-Supported Row
You don’t have to limit yourself to dumbbells when you do the chest-supported row. A straight barbell can be cumbersome to use, but an EZ-curl bar can let you go heavier than dumbbells and use a palms-up grip, which will bring more lats and biceps into the movement.
Step 1. Load an EZ-curl bar and set it below the bench. Use small plates so that the weights don’t hit the floor when your arms are extended. Grasp the bar with hands shoulder-width apart and your palms facing up.
Step 2. Row the bar until it touches the bench—your shoulder blades should still be fully retracted at the top.
Chest-Supported Row Alternatives
(See 05:44 in the video.)
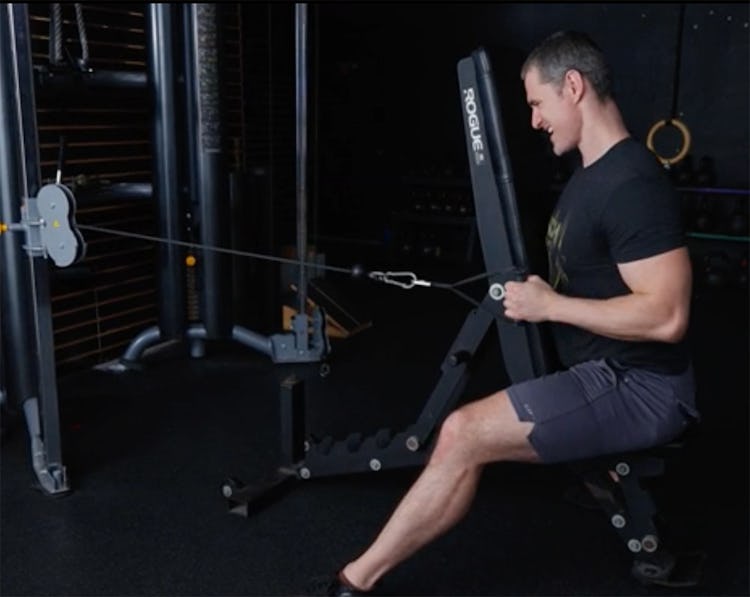
If there’s one drawback to the chest-supported row on an inclined bench, it’s that many benches can only be set to 45 degrees, and that does tend to cause people to arch too hard at the top. A good fix for that is to raise the bench to about 90 degrees and perform the exercise seated rather than lying down.
You’re still doing a row with your chest supported, but you’ll be less likely to cheat your body position as you get tired or the weight gets heavy.
From a seated position, the resistance will have to come from in front of you rather than below, so a cable is a good idea here. And for ease of use, it’s usually better to work one arm at a time.
Seated, One-Arm Chest-Supported Cable Row
(See 05:48 in the video.)
Three-Point Dumbbell Row
(See 06:50 in the video.)
A dumbbell row with three points of support (one hand and two feet) provides a solid foundation for heavy rowing. It also allows you to work one side at a time, so you can identify and bring up any imbalances between sides.
Step 1. Stagger your stance so your legs provide a wide base of support. Keeping a long spine, hinge at the hips and place one hand on the bench. Pick up the dumbbell with your free hand, and brace your core.
Step 2. Row the dumbbell to your hip.
Chest-Supported Rows Vs. Barbell Rows: Key Differences
(See 07:17 in the video.)
Chest-supported rows and bent-over barbell rows train mostly the same muscles, but the chest-supported row offers more isolation and less activation of the lower back. In the barbell row, the strength of your lower back will always limit the amount of weight you can row. So, if your goal is to build muscle and strength in your back, and you’ve been grinding out barbell rows for years, you may want to switch to the chest-supported row. Likewise, if you have a lower-back injury, barbell rows might aggravate it while the chest-supported row can let you train your back pain-free.
Another advantage of the chest-supported row being so stable is that it will help to prevent you from bouncing or rocking the weight up, which tends to happen when people barbell row.
How To Warm Up Before Chest-Supported Rows
(See 08:00 in the video.)
Include the following movements in your warmup.
T-Spine Rotation
(See 08:06 in the video.)
Step 1. Get on all-fours so your hands are directly underneath your shoulders and your knees are underneath your hips. Tuck your tailbone under so your pelvis is perpendicular to your spine, and brace your core. Push your hips back so your butt is close to your heels, and place your right hand on the back of your head.
Step 2. Twist your torso to point your right elbow out to your left-hand side, and then sweep it back up, rotating until your elbow points overhead. Avoid flexing or arching your lower back at any point. That’s one rep. Do 2 sets of 10 reps on each side.
Kneeling Elbow Circle
(See 08:51 in the video.)
Step 1. From the same all-fours position as the T-spine rotation, turn your elbows to point out to the sides and then bend them, lowering your body to the bottom of a pushup.
Step 2. Turn your elbows toward your body and extend your arms to return to the starting position. That’s one rep. Alternate directions each rep, and do 2 sets of 10 reps.
Who Should Do Chest-Supported Rows?
(See 10:07 in the video.)
If you have a lower-back injury, chest-supported rows will allow you to train the rest of your back hard and heavy without irritating your lumbar spine. Furthermore, if your goal is to put on muscle, the stability and isolation that the chest-supported row provides will let you train heavier and progress in load more quickly than a barbell row, and that means faster gains.
How To Fit Chest-Supported Rows Into Your Workouts?
(See 10:25 in the video.)
You can do the chest-supported row anywhere in your back workout or on an upper-body day. Since it trains the muscles that are opposite the ones that perform the bench press, it’s a good complement to bench pressing, and you can alternate sets of the two moves, or do the two exercises back to back to ensure that your training is balanced.
The chest-supported row can be done safely with heavy weight, as well as for high reps. Start with 2–3 sets of 5–10 reps, and add weight and reps gradually over time.
)