
CrossFitters call it a landmine row. Bodybuilders call it a T-bar row. But this row, by any other name, would still build back muscle and strength as sweet. Use this guide to learn all the different ways to row with a landmine to build complete back and lat mass and strength.
What Is The Landmine Row and What Are Its Benefits?
(See 00:15 in the video above.)
The landmine row is a barbell rowing movement where one end of the barbell rests on the floor, or is anchored using a landmine apparatus, allowing you to row the bar in an arcing motion rather than straight up and down. There are many ways to row with this setup, and we’ll go over all of them in this article, but the most basic and popular version is to straddle the bar and row it with both hands using a V-grip handle (the kind you see on cable machines). To bodybuilders, this is called a T-bar row, and it’s a great, old-school exercise for the back, and the lats specifically. (Some landmine machines provide barbells that have a handle fixed perpendicular to the bar, forming a T-shape, hence the name.)
While it’s very similar to the classic bent-over barbell row, the landmine row has some big advantages. “The arc that the bar travels allows you to keep a more upright torso, which is easier on your lower back,” says Jonny Catanzano, an IFBB pro bodybuilder and physique coach (@jonnyelgato_ifbbpro). It also means that the weight will be closer to your center of gravity at the top of each rep, and that allows you to control it better, and even hold the top position longer than you could with a bent-over row, if you choose to. That can give you a better muscle contraction in your back, and makes the landmine row a good choice for hypertrophy (muscle-gain) training.
With one end of the bar fixed on the floor, the landmine—aka T-bar row—is also a more stable movement than a conventional barbell or dumbbell row, and that allows you to lift heavier weights. Flip through old bodybuilding magazines or books and you’ll see many lifters hoisting hundreds of pounds on T-bar rows, but super heavy bent-over rows are less common. The landmine setup simply allows for heavier weights to be lifted in a safer, more user-friendly movement, so it’s arguably the better choice between the two barbell rowing movements for physique development.
How To Do The Landmine Row
(See 02:55 in the video.)

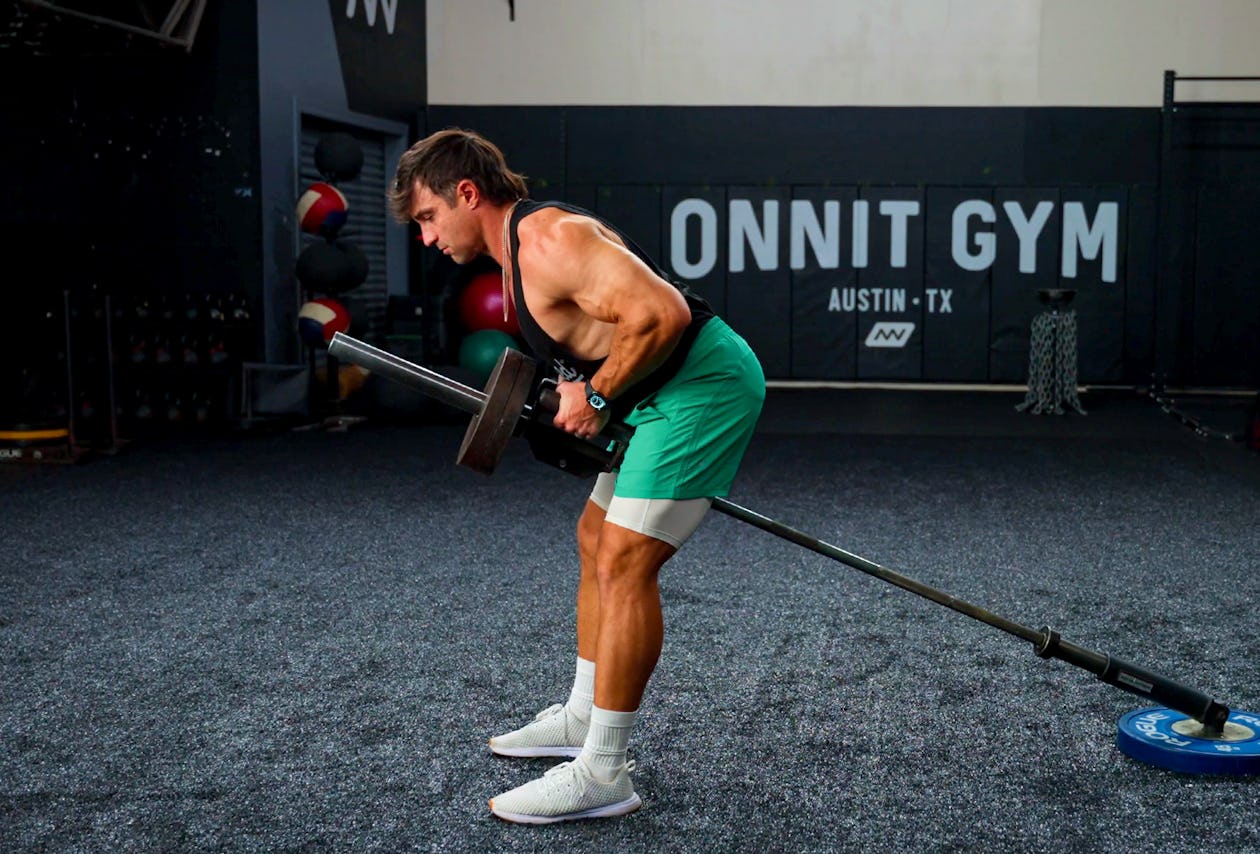
Ideally, you’ll perform the landmine row using a landmine unit. They usually look like home plate (baseball) with a metal sleeve attached that swivels, but some have feet (like furniture) or are simply a sleeve that can attach to the base of a power rack or even fit inside the donut hole of a weight plate (this is shown above). You can see a number of landmine options on amazon.com.
Using a landmine will keep the end of the bar secure and stable, but it isn’t absolutely necessary to perform landmine training. A second option is to cut a hole in a tennis ball and ram the end of the bar in so that you have a cushion, and then wedge the bar into the corner of a room. At the very least, you can wrap a towel around the bar and push it into a corner (the towel will help protect the walls).
Now let’s discuss how to perform the classic landmine row/T-bar row.
Step 1. Grasp a V-grip handle—the kind you often see people do cable rows with. If you don’t have a V-grip, you can improvise one by attaching gymnastics rings or any other adjustable handles you can access. The point is only to have a comfortable, firm grip that allows your palms to face each other when you row (a neutral grip). Place the handle on the floor next to the front of the bar.
Straddle the bar with feet about shoulder width, facing away from the landmine, and hinge your hips back. Allow your knees to bend, and keep a long line from your head to your tailbone, until your torso is 30–45 degrees to the floor and you can reach the handle. Hook the handle underneath the barbell, close to end of the bar where you’ll load the plates. Pick the bar up off the floor and play around with your stance, torso height, and the distance between your feet and the front end of the bar until you feel balanced and stable with your arms fully extended.
Step 2. Keeping your back straight and flat, and your core braced, row the bar until your back is fully contracted. Your elbows should come up close to your sides and your shoulder blades should squeeze together at the top. If the bar hits you in the groin, adjust your stance!
Step 3. Lower the bar until your arms are fully extended again, but don’t let the weight rest on the floor. Allow your shoulder blades to spread as you go down.
*Use 25-pound plates, or smaller. While it may be less efficient than loading the big 45s, smaller plates will allow you the greatest range of motion on the exercise. Bigger plates, on the other hand, will tend to bump into your chest and/or the floor, reducing the range you can train your muscles, and thereby making the exercise less effective.
“Think about driving with your elbows, rather than your hands,” says Catanzano. That will help you get the proper range of motion. “And be careful to keep a tight core.” As with a bent-over row, deadlift, or any other exercise that has you bending forward at the hips, you need to protect your lower back at all times. Bracing your abs and thinking “long spine” are essential. Catanzano also cautions against “ego lifting,” where you bounce the weight up and round your back on the way down for the sake of lifting heavier or getting more reps. Your hip and back position should remain the same the entire set; only your arms move.
Incidentally, if you’re in a gym that has a proper T-bar row (a handle that forms a T-shape), you can use that for your landmine rows too. The wider, palms-down grip will recruit more of your upper back and rear deltoids, while the landmine row with palms facing each other and elbows tight to your sides emphasizes the lat muscles.
What Muscles Does The Landmine Row Work?
(See 01:25 in the video.)
The landmine row works the back about as well as any exercise can. The muscles it activates include:
– Lats
– Traps
– Rhomboids (middle back)
– Rear delts
– Biceps
– Forearms
– Spinal erectors (lower back)
– Core (ab muscles)
It should be noted that holding the bent-over position tenses your hamstrings isometrically as well. Probably not to the degree that it will build hamstring size, but don’t be surprised if you feel stronger and more stable on deadlifts, RDLs, or other hip hinge exercises after a few weeks of landmine rowing.
Single-Arm Landmine Row Vs. T-Bar Landmine Row Vs. Barbell Landmine Row
Just to reiterate (or, if you’ve been skimming the page and missed it), the T-bar row and landmine row are essentially the same exercise. If you use a T-bar, which allows you to raise your arms out wider so your palms are turned down, you’ll work a little more upper/middle back and rear deltoids than if you use a V-grip handle and row with your elbows close in (the latter emphasizes the lats). There are several other variations of the landmine row, including single-arm versions, which we’ll explore in the next section. Single-arm landmine rows allow you to isolate one side of the back at a time and can increase the range of motion you get, making them a good option for physique training. They also allow you to use your free hand to help brace your hips, which can add stability. You’ll have to use less overall weight when doing a single-arm row of any kind, but this can be an advantage if your lower back is recovering from injury and you don’t want to load it with a heavy bent-over exercise.
Landmine Row Alternatives
The landmine row can be done in different ways to suit your changing goals.
Single-Arm Landmine Row
(See 08:20 in the video.)

By stepping off to one side of the barbell, you can easily turn the landmine row into a unilateral exercise for the lats, similar to a dumbbell row.
Step 1. Set up as you did for the regular landmine row, but stand to one side of the bar and narrow your stance to between hip and shoulder width. Hinge your hips and grasp the bar with the hand nearest to it (grip it close to the end of the bar). Stand up with the bar, and reset your hinge so your torso is angled forward and your back is straight and flat.
Step 2. Row the bar, retracting your shoulder blade, and then lower it back, allowing your shoulders to spread. Avoid twisting your torso to either side. Keep your core braced and your shoulders square to the floor.
“You can adjust your position to affect the muscles in different ways,” says Catanzano. If you stand with your feet a little further forward so that you get into an even deeper hip hinge, and then lift the bar with your elbow out a little wider, you will shift the emphasis from the lats to your upper back. “If you set up to where your legs are straighter and your chest is a little lower, you can hit a little more lower lat.”
Meadows Row (Elbow-Out Landmine Row)
(See 09:50 in the video.)

Standing perpendicular to the bar and rowing it with your elbow flared out really shifts the work from the lats to the upper back and rear delts. This version was popularized by the late bodybuilding coach John Meadows, and has therefore come to bear his name.
Step 1. Stand so that the end of the barbell points to your side and spread your feet shoulder-width apart, or stagger them—whichever feels more balanced and comfortable. Hinge at the hips and grasp the end of the bar with one hand. Since the sleeve where you load the plates is thick in diameter, it can be hard to hold onto—especially with sweaty hands—so consider using lifting straps to reinforce your grip. Brace the elbow of your free arm against your leg for some extra stability.
Step 2. Row the bar, driving your elbow as high as you can. Again, avoid twisting and keep your shoulders square. Your upper arm should end up about 60 degrees from your side—much farther away than the landmine rows we’ve shown up to this point.
Bench-Supported Landmine Row
(See 12:20 in the video.)

If the landmine row (any variation) has a weak link, it’s that it requires a lot of stability to perform. Bracing your core and torso in the bent-over position takes a lot of energy and spreads the muscle tension over your whole body. That’s cool if your goal is to build total-body strength with a movement that works a lot of muscle at once, but it’s a bit limiting if you want to make your back muscles work to the max and get the best stimulus for growth. In the latter case, Catanzano recommends pulling a bench over to rest your free hand and knee on while you perform the Meadows row. “The stability the bench provides will allow you to lift heavier loads,” says Catanzano, “and that will recruit more muscle fibers in your back.”
Band-Resisted Landmine Row
(See 13:00 in the video.)

Catanzano has one other minor gripe with the landmine row, arguing that, as you row the bar closer to your body, your mechanical advantage increases and the weight gets easier to lift. This reduces the tension on the muscles. “In a muscle-building scenario,” he says, “we ideally want the resistance to stay the same or get even heavier throughout the range.” The fix is as simple as adding a resistance band to the bar.
Step 1. Set up a bench as shown for the bench-supported landmine row, and place a heavy dumbbell on the floor next to it. Wrap a mini band around the dumbbell a few times so there’s only a foot or two of slack end. Loop the end of the band over the sleeve of the barbell.
Step 2. Row the bar in the Meadows row style explained above. Because the band will be pulling the bar back down, and the tension increases the higher you row it, you’ll have to row faster and more powerfully. This will ensure that your back is giving its all throughout the exercise.
See more back training ideas from Catanzano in our guide to getting a lat spread like a bodybuilder.
And check out these back and biceps workouts for the ultimate pull day routine.


