Some days you need to recover, but that doesn’t necessarily mean no working out! Find out why you need some off-day sled training! I enjoy doing mobility work and spending time getting warm and loose before training, but there are days that I awake aching and barely able to utter a coherent grunt. These are perfect days to pull a sled!
Why Use Weight Sleds For Recovery?
There is no eccentric component to weight sled pulling, so it won’t make you sore. You can work hard with little risk of overdoing it, as long as you pay attention to volume. It’s extremely versatile, scalable, and activates everything.
Best of all, afterwards your hips feel mobile and your body feels integrated and ready for almost anything. We use weight sled pulling as a warm up, but I’ve spent entire training sessions pulling weight sled. You can pull forward, backward, laterally, and from the hips, shoulders, or arms, starting light and working up to an all-out beastly effort.
Where To Get A Weight Sled?
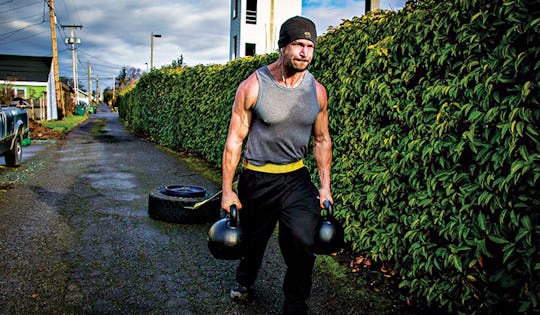
Now you may be wondering… where do get a weight sled? Make one! There are many commercially available sleds that work just fine, but I would rather spend the money on food! Assemble an old truck tire, a U-bolt, and a towing strap and you are in business.
Old truck tires can be found for free at any tire store. You can pur- chase U-bolts (stainless steel) at a hardware store for about $3, and almost any sturdy cordage will work. I like to use a 2” towing strap because the 2” width does not cut into my hips the way a rope would. Simply drill some holes, install the hardware, attach the strap to the bolt, wrap the other end around your waist, and start walking.
TIP: When drilling the holes into the tire for the U-bolt, be sure to put them toward the top of the tire tread. If you put the bolt in the middle or bottom the tire will tend to lift when you pull it, reducing the contact with the ground and the friction making it easier.
Aside from the cost, friction is the key advantage of using a tire over a commercial steel weight sled. Steel weight sleds slide along the ground easily, requiring more weight for the same effort. But a tire grips the ground, particularly when the ground is hot and dry! When selecting a tire, bring a tape measure.
Measure the diameter of your weight plates and pick a tire that the plates will sit on top of without falling through. For stacking plates, use a branch with a Y in it or make something from scrap that will go through the hole in the plates, but won’t fall all of the way through. If you don’t have plates, mount a box on the top and load it with rocks, kettlebells, or pretty much anything heavy.
What To Do With Your Weight Sled?
I always start light and add resistance (weight) as my hips loosen up. The distance is up to you and how you feel on a given day (but 50 yards should be plenty). We do most pulls with a 55lb tire and a 45lb plate. If the road is dry, wet, or even snowy, you will require more or less weight. For recovery, the goal is to work hard but not to exhaustion.
Sample Weight Sled Training
Forward Pulls – Focus on each step as a single effort, not using momentum. Think “drive” each step.
Backward Drag – Keep the knees in line (tracking) with the toes.
Side Drag – Lunge sideways in one direction up and back, facing the same direction so you get both sides. You may need to go lighter for these.
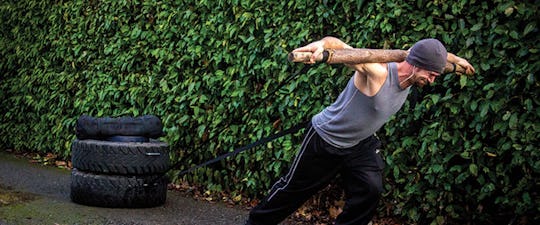
Variation Drag – A trip up with the strap over your shoulder and a trip back with the strap in your hands pinching your shoulders back with your elbows at your sides.
From here, you should be ready for almost any type of workout, or you can begin mixing things up and doing some sport-specific conditioning while pulling sled.
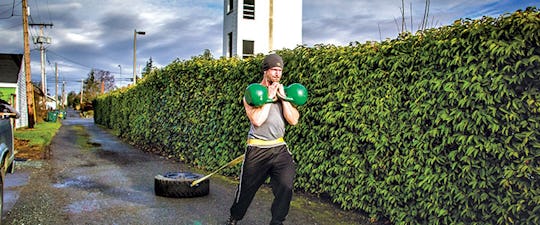
Farmer Carry Drag – With the strap around your hips, farmer carry and Kettlebell rack holds are your bread and butter.
Odd Object Carry Drag – Med ball and sandbag carries get brutal and are reminiscent of Arnold Schwarzenegger pushing the grinding wheel in Conan.
Press & Row Drag – Pressing and rows with the straps make these types of movements extremely full-body. Press the strap(s) out in front of you then reset for another press by walking forward. Same for rows.
Hand Over Hand Pulls – If you have a stout rope, attach it to the sled, load it up, walk out to the end of the rope and hand-over-hand, pull the sled toward you.
Weight Sled Tips
I don’t recommend any overhead carries because with the resistance of the sled at your hips, maintaining a load overhead in good alignment is almost impossible. Bear crawls and “sprints” are phenomenal, but may be too much on recovery days, so be sure to check in with how you are feeling that day, as these can get a bit intense!
No matter what variation of sled pull you do, keep your body in an anatomically neutral position, especially the spine. Before you pull, tighten up the mid-section like you are bracing for a punch to the gut and stay tight while working. Keep your chest up, head neutral and shoulders back. Enjoy!
)

