The barbell has been a staple piece of exercise equipment for more than a century. Nobody questions its potential for helping one build muscle, strength, and athleticism, and yet the steel mace—an even older training tool—remains a mystery to most. If you’ve been curious about steel mace training but don’t know where to begin, or feel intimidated by what seems like a medieval bludgeon, let this guide demystify the mace for you. By the end, you’ll understand why it’s outlasted innumerable fitness innovations and gimmicks alike to remain one of the most effective training implements you can use to enhance stability, mobility, power, and rotational strength.
What Is A Steel Mace?
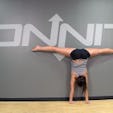
(See 00:35 in the video above.)
We won’t sugarcoat it: the mace was invented to kill people. But it wasn’t long before folks realized that lifting one could help them get into great shape too.
The use of a mace dates back to the days when fitness was a fortuitous byproduct of training for war. More than 2,000 years ago, Hindu soldiers in India wielded maces that were nothing more than bamboo sticks with stones tied to the ends. One of their deities, Hanuman, was a monkey-man hybrid who carried a mace and, as the legend went, could lift the Himalayas with his hands. Called a “gada,” the mace was primarily used to help condition warriors for their combat training, which included wrestling, archery, and sword fighting.
“If we look back at various martial cultures,” says John Wolf, co-creator of Onnit’s unconventional training curriculum, “they all used some kind of mace.” Historical records indicate that different varieties of maces were present in India, and later Russia and Western Europe during the Middle Ages, as each culture experienced a time when the armor of its warriors became more advanced than the weaponry used against it.
As anyone who’s seen Braveheart or Robin Hood knows, maces evolved to where they had spikes on the ball end, and they helped turn the tide of many a war. But the gentler, more primitive models were never discarded as a tool used off the battlefield to get a great workout.
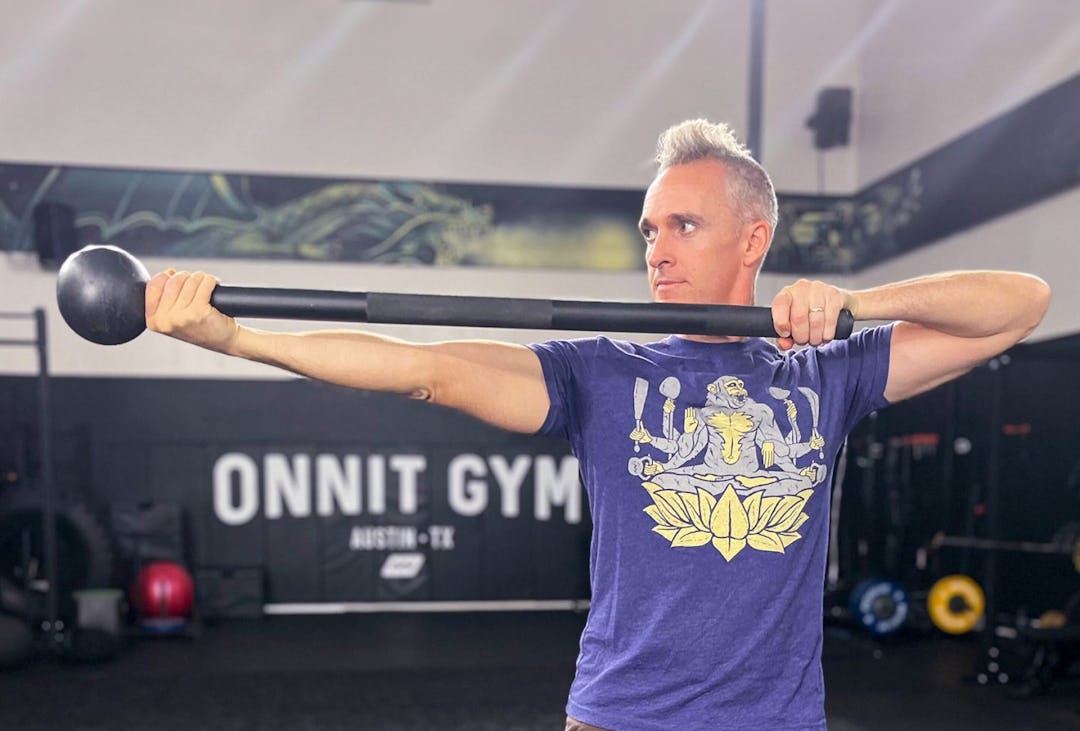
When you think about it, a steel mace is really just another barbell, albeit with a weight on only one end. They usually range from around seven pounds to 25 or more, and you can do everything with a steel mace that you ever learned to do with a barbell. And that’s just the beginning.
Performing classic strength exercises such as the squat, overhead press, Romanian deadlift, and bent-over row with a mace works all the same muscles that the barbell will, but with a bonus. The imbalance created by the load of the mace head (the ball at the top of the mace handle) will make it difficult to lift the mace evenly. It wants to pull you out of position, twisting you in the direction of the heavier end, so you have to work that much harder to keep the path of motion even—calling on your core, grip, and various stabilizer muscles to do so. Spend a few weeks doing these exercises with the mace and then see how you feel doing them with a regular barbell again. Don’t be surprised if you feel more stable and strong, and break strength plateaus shortly thereafter.
What Are The Benefits of Steel Mace Training?
(See 01:40 in the video.)
You don’t even have to work out with the mace, per se, to reap some benefits from it. The long lever that the handle creates makes it fantastic for increasing mobility. If you have tight shoulders and a rounded upper back, for instance, as a result of too much chest training and/or sitting at a desk in front of a computer for too long, try holding the mace behind your head with the mace head pointing to the floor. Swing it gently side to side to feel the mace gradually pull your shoulders into greater flexion, opening up your chest and stretching your thoracic spine. Many people find this helps relieve shoulder pain, and warms them up for an upper-body or pressing workout.
Rotational Strength
Once you’ve gotten a feel for the steel mace, you can begin to unlock its greatest potential—using it as a tool to train rotation. The fact is, most people’s training is limited to the sagittal movement plane. This means exercises where the trunk or limbs move forward and back, as in a bench press, curl, squat, deadlift, and running. Nevertheless, most of the movements we make in sports and everyday life aren’t that simple. They’re combinations of all three planes of motion—moving forward and back, side to side, and in rotation. With that in mind, doesn’t it make sense to train these movements in our workouts?
The steel mace facilitates the body’s ability to rotate—and resist rotation, when needed—more so than the kettlebell, steel club, or any other training implement.
It lends itself perfectly to performing chopping and paddling motions that make your shoulders, torso, and hips twist—something they can’t do as well or as safely with a barbell or other conventional equipment. The length of the mace handle is ultimately designed to be swung. Swinging the mace creates tremendous force—a force that threatens to knock you off balance and out of position unless you learn to control it. As a result, steel mace training is one of the best ways to instill good posture and movement mechanics. It trains you to maintain what trainers refer to as the body’s structural integrity, so that you can stay stable and in control of how you move no matter what storm you find yourself at the center of, be it running and cutting on a field, fighting an opponent in a cage, shoveling snow out of your driveway, or a million other challenges.
Power Development
Of course, with greater rotational movement comes greater power.
Knockout punches and kicks, 90-miles per hour fastballs, and 300-yard drives off the tee all depend on your ability to coil and uncoil your body rapidly and efficiently, and steel mace exercises can simulate the movement mechanics involved in all of the above.
When you’re ready, you can advance your training to include an infinite number of more complex moves that are unique to the mace and really take advantage of its rotational potential, such as the 360, barbarian squat, uppercut, and various other techniques you’ve no doubt seen demonstrated on YouTube (some of which we’ll introduce you to in this article). You’re even welcome to make up your own exercises, as one of the mace’s greatest attributes is its ability to help you express yourself, using it to flow through movements that train your body as well as communicate your passion, not unlike a dance, martial art, or other physical art form.
Fun!
If you’re the kind of person that just can’t get excited about going to the gym and lifting weights from point A to point B, the mace might be the thing that finally motivates you to work out. Wolf says there’s a primal rush you get from lifting the mace overhead that has to be experienced to be understood. Because of its origins as a weapon, it makes you feel like a warrior when you use it. Curling a barbell? Not so much.
“I think part of the appeal is that you can feel the applications the steel mace has immediately,” says Wolf. “Whether or not we feel removed from our history as a tribal people who fought wars, there’s an innate knowledge of how to use tools like the mace that’s still in us. The steel mace can help you tap into that, even if it’s just to get in better shape.”
The Science of Steel Mace
It’s a little ironic that the mace is one of the oldest fitness tools on earth and yet remains among the least studied. Fortunately, that may be changing, as researchers at California State University conducted a trial using Onnit’s steel maces. (Onnit did not suggest or commission the study—the researchers acted entirely on their own.)
“I have a grad student, Christian Ison, who’s a trainer, and he implements the mace in
the training he does with his clients,” says Dr. Eddie Jo, Associate Professor of Exercise Physiology at Cal Poly Pomona, and director of its Human Performance Research Lab. “We were talking about the mace one day and realized there haven’t been any studies done on it, to our knowledge, so why not do one ourselves?”
Jo’s team gathered subjects who had recreational training experience—people who were already performing some kind of resistance training at least three days per week and for at least an hour per session. They had no prior experience using the steel mace. Jo had them work out with Onnit steel maces, following the directions provided in the manuals that were packaged with them.
“We wanted to look at muscle activation patterns during common steel mace exercises,” says Jo. The exercises chosen were the overhead squat, 360, reverse lunge, and lap squat. “We put EMG sensors on the dominant sides of the subjects, and we had them do a set of each of those exercises with the mace head positioned on the dominant side as well as the non-dominant side to see how the dominant side muscles reacted.”
Unsurprisingly, the muscles on the dominant side (for instance, the quads, traps, deltoids, pecs, and triceps during the overhead squat) showed greater activity when the lift was done with the mace head on that side (i.e., pointing to the right on a right-handed person). “But what was interesting,” says Jo, “was when we looked at the oblique and core muscles. The activation of those muscles was greatest when the mace head was held on the opposite side. So if you’re doing the switch squat and the mace head is pointing left, the right obliques will fire harder. It shows that the mace gives you a very unique muscle activation pattern compared to normal barbell exercises, so this could introduce a whole new type of stimulus for your muscles to adapt to.”
Jo adds that being able to work one side of the body and then transition to the other side by simply flipping the orientation of the mace makes the training effect unique as well as convenient. “Your ability to shift core activation is very dynamic and fluid with the mace,” he says. “You can also accomplish more than one type of movement in a single set if you want to, going from a lunge into a lap squat and then an overhead squat, for example.”
More studies need to be done to determine what the long-term benefits of steel mace training can be, but Jo speculates that the mace has great application to sports training. “In life and in sports, when you’re jumping, you’re usually turning also. With the steel mace, you can produce those same multi-planar movements, but with increased resistance. That helps athletes develop power, and should carry over to the playing field—as well as have benefits for general fitness.”
Beyond the physical advantages of steel mace training, Jo noticed some mental ones too, explaining that the subjects said they “loved using the mace,” and that the offset weight helped them to focus on their form more. “They reported feeling sore the next day, too,” says Jo, “saying that they felt they had gotten a good workout.”
What To Look For In A Steel Mace
So you’re ready to buy a steel mace. Congratulations! But before you plunk down your hard-earned funds on another piece of exercise equipment—or try to sand the spikes off a medieval antique—make sure you know what kind of mace is best for you. Consider the following.
The Handle
The bigger your hands, the bigger your mace handle should be. The smallest mace Onnit sells is a seven-pounder, which offers a 30.5-inch long handle. Most women find this model to be appropriate to start. On the other end of the spectrum, our 25-pound mace has a 40.5-inch handle, which is really only for advanced mace wielders.
Remember that steel mace training is humbling. Even a big, strong guy won’t be able to start out with a 25-pound mace for most exercises. And (as most women say) longer isn’t necessarily better. A longer mace is harder to control and puts more stress on your body, so start small.
The Feel
A mace that’s too slick can fly right out of your hands when you get sweaty. Meanwhile, one that’s too tacky can pull the skin off your palms. You want a mace that provides some friction but still allows your hands to glide up and down the handle. Onnit maces feature knurling, like a barbell, and a powder coating for a no-slip grip.
The Weight
Onnit makes maces that weigh 7, 10, 15, 20, and 25 pounds. Most women start with the 7 or 10-pounder, and most men can handle the 10 or 15. For some mace exercises, a lighter weight will serve you better, while other moves can be loaded up more, so you should consider buying two weight increments at once.
Beginner Steel Mace Workout
(See 03:00 in the video.)
The following routine strings together some basic but challenging steel mace moves that will not only give you a feel for mace training but help you start building stability and rotational movement skills right away.
DIRECTIONS
Perform the exercises as a circuit, completing one set for each move in sequence without rest. After the last exercise, rest up to 90 seconds, and repeat the circuit for 3–4 total rounds. Perform 8 reps on each exercise (8 reps per side).
1. Overhead Walk
(See 03:27 in the video.)
Step 1. Hold the mace with an overhand grip, hands about shoulder-width apart. Curl at the elbows and press the mace overhead. Keep your ribs pulled down and your pelvis tucked under so it’s parallel to the floor—don’t allow your back to hyperextend as you reach overhead. Brace your core.
Step 2. Find your balance and begin walking in place, raising one knee at a time up to hip level. The mace will try to pull you toward the side that the weighted end is pointing—don’t let it. If you’re having a hard time controlling the mace, widen your grip a bit. A step on both legs equals one rep; do 8 reps, and then switch the direction the mace is pointing and repeat for another 8 reps.
2. Switch Curl
(See 04:38 in the video.)
Step 1. Hold the mace with one hand close to the mace head and palm facing up. The other should be close to the bottom of the handle with the palm down.
Step 2. Extend the arm that has the palm up so the mace head points down at a 45-degree angle (curl the other arm up and point your elbow out to the side).
Step 3. Now raise the mace head so the mace is level in front of you, and then raise it up to point about 45 degrees (diagonal through your shoulder). Continue raising the steel mace until it points straight up. Now slide the hand on the bottom up the handle to meet the other hand. Your hands will come together for a moment like you’re praying.
Step 4. Slide the hand that was on top down the handle while the one you just moved up grasps the mace head underhand. Go to 45 degrees, level, and then 45 degrees toward the floor again. Continue rotating the mace in this fashion, pausing a moment in each position to make sure you control it. Over time, you can smooth out the motion so you spin the mace more fluidly. Perform 8 reps with the mace head pointing to the right, and then 8 pointing to the left.
3. Split-Stance Counter-Side Row
(See 05:50 in the video.)
Step 1. Hold the mace with hands overhand and shoulder-width apart—one hand should be at the bottom of the handle. Twist your torso so that the mace head points behind you. Stagger your stance so that your front leg is the same side as the direction you’ve turned. Put most of your weight on your front foot. Your back leg should be nearly straight. Drive the ball of your back foot into the floor—the heel can be raised.
Step 2. Row the hand that’s closest to the mace head up. The range of motion will be small, but focus on holding your rotated position.
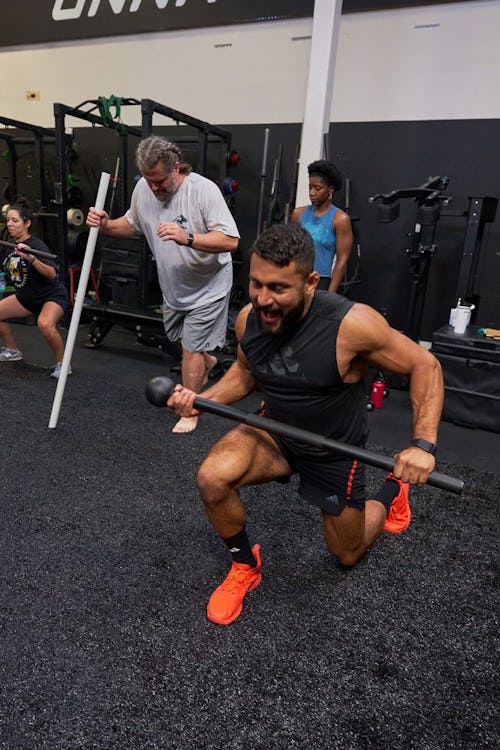
4. Uppercut
(See 07:07 in the video.)
Step 1. Take a wide grip on the mace so one hand is flush against the mace head. Rotate your body in the direction the mace head points, but keep your hips braced and pointing forward. Keep your elbows locked out.
Step 2. Leading with your elbow, raise the mace up and across your body so it’s angled 45 degrees in front of your chest. Continue raising it until the mace is over your opposite shoulder. Your front arm should look like you’ve just thrown an uppercut punch. Keep the mace close to your body at all times.
5. Cross-Body Lateral Lunge
(See 08:43 in the video.)
Step 1. Grasp the mace with a wide grip and one hand flush against the mace head with your palm facing up. Step laterally with the leg opposite the mace head, bending your knee and lowering into a side lunge as you rotate the mace downward so the head points toward the floor at a 45-degree angle.
Step 2. From there, step back to your starting position while spinning the mace back up to point 45 degrees upward, and then vertical, bringing your hands together in prayer position.
Step 3. Switch your hands, and perform the lunge on the other leg.
Intermediate Steel Mace Workout
(See 10:05 in the video.)
When you’re ready for a greater challenge that incorporates even more multi-planar movement, step up to this intermediate mace routine.
DIRECTIONS
Perform the exercises as a circuit, completing one set for each move in sequence without rest. After the last exercise, rest 45 seconds, and repeat the circuit for 3–5 total rounds. Set a timer and perform each exercise for 30 seconds straight, switching sides at 15 seconds where applicable.
1. Switch Squat
(See 10:27 in the video.)
Step 1. Hold the mace with one hand flush against the mace head and your palm up. Draw your shoulders down and back and tuck your elbows to your sides. Turn your toes out a few degrees.
Step 2. Keeping a long line from your head to your tailbone, squat down until the mace is just above your thighs.
Step 3. As you come back up, slide one hand up the handle and the other down to prayer position, and then continue twirling the mace so the head faces the other direction. Squat again. Inhale as you come up on each rep, and exhale as you squat.
2. Alternating Archer Press
(See 12:22 in the video.)
Step 1. Hold the mace with one hand flush against the mace head and your palm up. Begin with the mace head pointing 45 degrees over one shoulder.
Step 2. Push the mace straight out in the direction the mace head is pointing until your trailing arm is raised to shoulder level and the one nearest the mace head is fully extended, or as close as you can comfortably go. It should look like you’re about to fire an arrow from a bow.
Step 3. Draw the mace back in so it faces upward, make a prayer position, and repeat the archer press on the opposite side.
Rear-Lunge Uppercut
(See 14:43 in the video.)
Step 1. Take a wide grip on the mace so one hand is flush against the mace head. Rotate your body in the direction the mace head points, but keep your hips braced and pointing forward. Keep your elbows locked out.
Step 2. Step back into a lunge with the leg that’s opposite the mace. Lower your body until both knees are bent roughly 90 degrees.
Step 3. Step forward to return to the starting position. As you do so, raise the mace up and across your body so it’s angled 45 degrees in front of your chest. Continue raising it until the mace is over your opposite shoulder. Your front arm should look like you’ve just thrown an uppercut punch. Keep the mace close to your body at all times. Perform reps for 15 seconds, and then switch sides and repeat.
Steel Mace Flow Workout
When you’re comfortable with the steel mace basics, move on to this flow routine, which links familiar steel mace exercises into a fluid circuit.
)