The hip thrust is one of the most popular exercises you’ll see in a gym, and possibly the best glute-building exercise you can do, but the two-legged version isn’t the only variation on this movement that you should be practicing. Doing the hip thrust on one leg while using the other as a kickstand to provide some balance—aka a B-stance hip thrust—can provide an even greater challenge for those who feel they’ve mastered the basic thrust, while at the same time serving as an alternative for people who find that the classic thrust bothers their lower back. The B-stance hip thrust, then, is both a progression of and a substitute for the hip thrust, and one that allows you to work one side of your body at a time.
What Are B-Stance Hip Thrusts and What Are Their Benefits?
(See 00:46 in the video above)
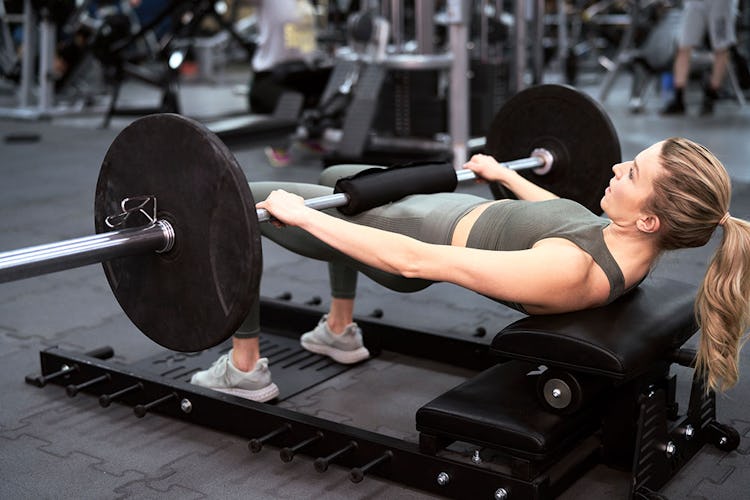
The B-stance hip thrust is sometimes called a “hip thrust with a kickstand,” or a “staggered-stance hip thrust,” because you use one leg for balance while the other one thrusts. Like the conventional bilateral hip thrust, you lie back on a bench (your body perpendicular to it), and raise your hips up to lockout, but in the B-stance thrust, you push with one foot while the heel of the other one stays grounded for extra support.
You see, most people start out with the regular bilateral hip thrust, where you work both glutes at the same time. Later, they try to progress to the single-leg hip thrust, which has you holding one leg up in the air while you thrust with the other one. The problem is, going from two-legged hip thrusts to single-leg thrusts is too big a leap for most people. It can be very hard to stabilize your hips and avoid twisting to one side when you’re doing true single-leg hip thrusts, and many people find that even their bodyweight alone is too difficult to control for more than a few reps.
That’s where the B-stance hip thrust comes in. It’s a nice intermediate exercise that’s more challenging than the basic two-legged hip thrust, but more stable than the single-leg hip thrust, so you can work one side at a time and build your balance without having to work too hard to keep your body aligned and on the bench.
In addition, because it’s a unilateral exercise, it allows you to isolate one glute at a time, which helps correct any imbalances you have between sides. Also, focusing on one muscle area at a time recruits more muscle in that area, which can help you add muscle size more easily. So, if you want a big, round butt, the single-leg hip thrust is a very good exercise choice.
Lastly, if you have lower-back pain, and you find that two-legged hip thrusts hurt to perform—maybe because you hyperextend your back at the top of the movement—you may find that the B-stance hip thrust is more comfortable to do. Because you’re essentially working one leg at a time, you can’t thrust as hard or as high, so it’s harder to overextend your range of motion. The single-leg hip thrust keeps the force where you want it—in your glutes—and out of your lower back.
How To Do B-Stance Hip Thrusts
(See 03:00 in the video)
The B-stance hip thrust builds off the conventional two-legged thrust. Once you’ve found a comfortable position for bilateral thrusts, it’s an easy transition to B-stance thrusts.
Step 1. Secure a bench against a wall or rack so it doesn’t slide; you can also weight it down with heavy dumbbells. Lie back on the bench, perpendicular to its length, so that the edge of the bench supports your body right under your shoulder blades.
If you’ve tried hip thrusts in the past and felt them too much in your lower back, you can try sliding your body up a little higher so the bench supports your mid-back rather than the bottom of your shoulder blades.
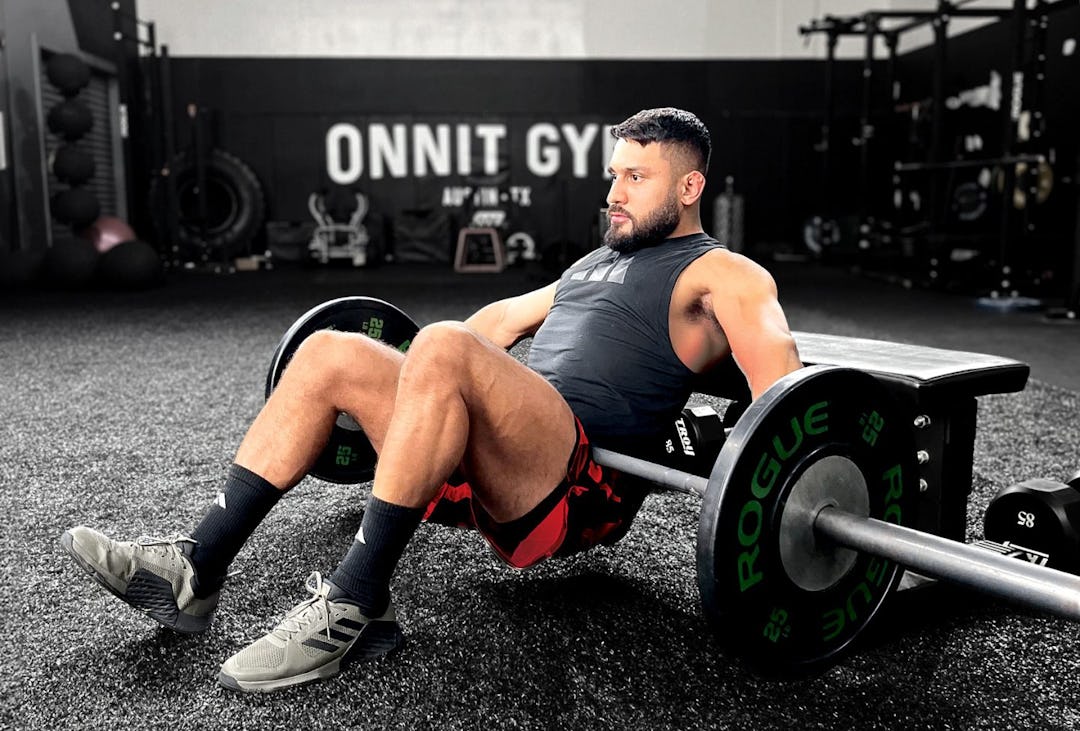
Now extend your hips to get into the top position of the double-leg hip thrust, so your shoulders, hips, and knees are aligned. Adjust your feet so that they’re directly below your knees. Now when you lower your hips down, your stance should be set so that you can thrust with the greatest range of motion and good form.
Feel free to play around with your foot position, angle, and spacing a little more, and do a few practice reps, until you find a setup that’s the most comfortable and lets you feel your glutes working more than any other muscle. This will be your normal bilateral hip thrust setup.
Step 2. Now you’ll transition from the bilateral hip thrust to the B-stance. Extend one leg forward so the heel lines up with the toes on the planted foot. This partially-extended leg is called your kickstand leg. Keep the toes on your kickstand leg elevated so the weight of your leg is resting on that heel.
Step 3. Tuck your chin to your chest, and make fists with each hand, driving the back of your arms into the bench for stability. Tuck your tailbone under, and brace your core. Now drive through the foot of your planted leg to extend your hips until they’re locked out and parallel to the floor. Push both knees out a bit as you extend your hips, and keep your ribs pulled down so you don’t bend at the spine.
Your shoulders, hips, and knees should form a straight line in the top position.
According to Bret Contreras, PhD, author of Glute Lab and arguably the world’s foremost expert on glute training, the kickstand leg should only apply about 30% of the force in your B-stance thrust. Most of the work should be done by the leg that’s closest to your body. Remember, the kickstand leg is only supposed to provide some stability, so make your other leg’s glutes do the majority of the work.
Use your bodyweight alone until you’ve mastered the B-stance hip thrust technique. But when you think you’ve got it down, you can add a barbell to your lap for resistance, just as you do with the normal two-legged hip thrust. However: “I suspect that as you lift more weight,” Contreras writes in his book, “you will inevitably use your extended leg more to counterbalance the weight, which defeats the purpose of trying to load mostly one leg. So, as with the single-leg hip thrust, it’s better to keep the load light.” If you get to the point where B-stance hip thrusts for higher reps (north of, say, 10) don’t challenge you much anymore, it’s probably time to progress to the true single-leg hip thrust (with the non-working leg up in the air), which we explain in the B-Stance Hip Thrust Alternatives section below.
What Muscles Do B-Stance Hip Thrusts Work?

(See 05:40 in the video)
The B-stance hip thrust really works the gluteus maximus, which is your main butt cheek muscle, responsible for extending your hips. But it also trains the gluteus medius, which is on the side of your butt cheek, and the glute minimus, which lies under the glute medius. Both the medius and minimus work to stabilize the pelvis, so they will get trained by any variation of the hip thrust too.
While all variations of the hip thrust are fairly new exercises in the fitness world, research on them is mounting, and pointing to positive benefits both in terms of athleticism and glute muscle gains. A 2019 trial found that hip thrusting with a barbell improved subjects’ sprint performance. Meanwhile, in a landmark 2023 study, subjects were divided into two groups, with one team training the hip thrust and the other doing the barbell back squat—no other lower-body work was performed. After nine weeks, glute growth in both groups was roughly the same, indicating that the hip thrust is at least as good a glute exercise as the much beloved, age old, and tried-and-true squat.
Perhaps even more impressive, however, was another 2023 study that had two groups perform a full-body workout. One group did leg presses and stiff-legged deadlifts for their lower body in the session, while the other group did those two movements and then two sets of hip thrusts at the very end of the workout. Both groups saw gains. The non-thrusting group enjoyed a six percent increase in glute growth, but the ones who ended their workouts with thrusting grew their glutes by more than nine percent.
This gives us a little to think about. On the one hand, the subjects who hip thrusted did end up performing more work for their glutes than the other group did, which may account for their extra gains. However, you have to factor in that their hip thrusts were done dead last in the session, after they had trained both upper and lower body and accumulated a lot of fatigue. The body’s ability to recruit muscle fibers is greatly diminished for exercises that are done late in a workout—i.e., exercises done at the end of your workouts will never be as effective as those that are done at the beginning—so this suggests that the hip thrust may have outperformed the other glute exercises in the session (the leg press and stiff-legged dead), regardless of fatigue.
Note that all of the above research was done on the TWO-legged hip thrust, NOT the B-stance exercise, so it’s hard to say how B-stance thrusting compares to back squats, single-leg squats, leg presses, deadlifts, or anything else. But, until further research emerges, it’s a good bet that any hip thrust variation is going to be a solid choice for building the glutes.
How Do B-Stance Hip Thrusts Compare To Other Hip Thrusts?
The B-stance hip thrust is essentially the middle man between the bilateral thrust and the single-leg hip thrust, helping you progress from the former to the latter. It won’t allow you to train as heavy as the more stable, two-legged thrust will, but the B-stance will help you to better isolate the glutes on one leg at a time, while providing enough stability for you to train hard and safely. It’s also likely safer for the lower back than the bilateral thrust, because it lessens the risk of hyperextending the spine when you lock your hips out.
How to Stretch Before Doing B-Stance Hip Thrusts
(See 07:45 in the video)
Warm up and stretch out your glutes and hips prior to a B-stance hip thrust session with these moves, courtesy of Onnit-certified coach Eric Leija (@primal.swoledier). Do 2–4 sets each.
Pelvic Hip Circle
Reps: 3–5 reps
Stagger-Stance Hip Hinge
Reps: 5–10
Hinge Jump
Reps: 3–5
B-Stance Hip Thrust Alternatives
When you think you’ve got the B-stance hip thrust down, you can move up to the single-leg hip thrust, where you raise one leg in the air and work the other one without any support.
Single-leg Hip Thrust
Step 1. Set up as you did for the B-stance hip thrust but raise one leg off the floor entirely and bend that knee, bringing it toward your chest.
Step 2. Push your working foot into the floor and raise your hips until they’re roughly in line with your working knee and your shoulders. Remember to keep your ribs down and core braced.
Single-Leg Glute Bridge
If you want to isolate the glutes a little bit more, you can do a single-leg hip thrust motion on the floor, without a bench. This is known as a glute bridge. Bridging your hips up from the floor will decrease the range of motion some, but it will ensure that only your glutes do the work to move your hips (as opposed to the hamstrings, which do contribute a little bit to the hip thrust, while the quads kick in a little as well to extend the knee).

)


