

Most people don’t get excited about running on a treadmill or pedaling a stationary bike, but almost everyone likes the idea of wailing on a heavy bag for a workout. Boxing/martial arts training speaks to a primal instinct we all have (that is, the instinct to kick ass), so, in addition to packing a punch conditioning-wise, it’s fun to do. If you’re the type who loathes conventional cardio, it’s time you learned how to lace up the gloves to knock out body fat.
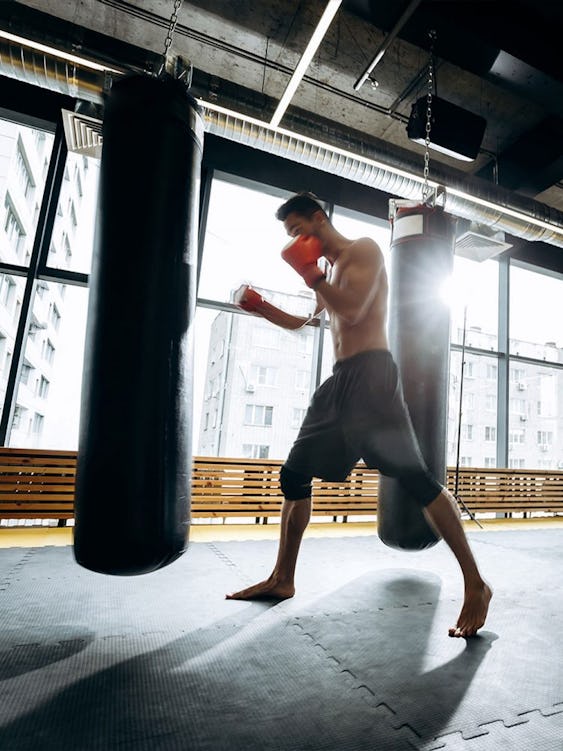
Apart from beating boredom, bag training offers some functional, athletic advantages that more mainstream modes of cardio don’t. “On a treadmill, bike, or rowing machine, there’s a consistent cadence, and your breathing is rhythmic,” says Onnit Pro Team manager Andrew Craig, who’s also a veteran of the UFC’s middleweight division. “But when you train with a heavy bag, your inhalations and exhalations are rapid and varied.” This makes them similar to how you would breathe in a fight, and most other stop-and-go, anaerobic activities. Assuming your striking technique is good, you’ll generate power that starts from your feet, and is then released with the twist of your torso. “The rotation required to throw a punch or kick works just about every muscle in your body. You move through multiple planes of motion in ways you wouldn’t with any other training tool.”
In this article, you’ll learn all about how to train with a punching bag, including the best bag to get and the right gear to go with it, and you’ll discover two punching bag programs that you can use for full-body workouts that get you lean and conditioned. It’s the baddest cardio on the planet!
What’s the Difference Between a Heavy Bag and a Punching Bag?
First, let’s clear up a small but significant matter of terminology. Many people refer to heavy and punching bags interchangeably, as if they’re one and the same. However, a heavy bag is just one type of punching bag.
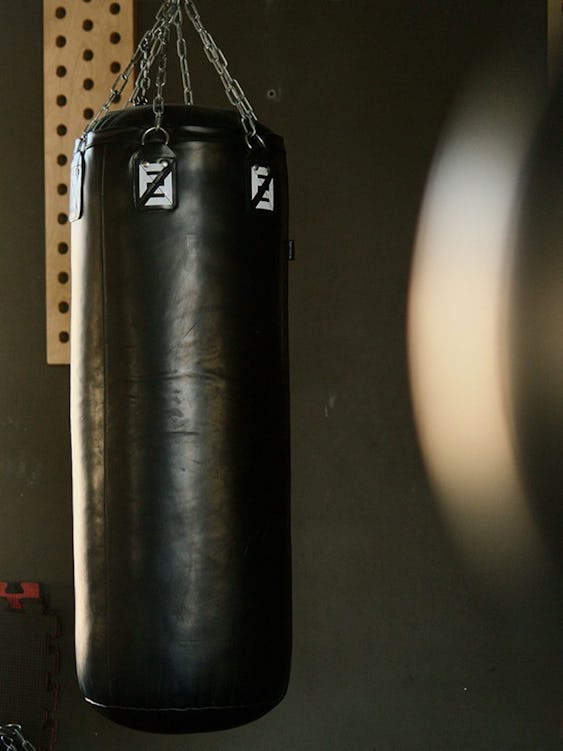
“A regular heavy bag is usually four or five feet long, and is mainly used for punching,” says Craig. They often weigh between 30 and 200 pounds, and typically hang from the ceiling or another structure overhead. The heavy bag doesn’t move much when you strike it (hint: because it’s heavy). The classic heavy bag is a cylinder shape, but there are offshoot bags with different designs that offer distinct training advantages. “There’s a banana bag, which is longer—up to six feet—and often thinner,” says Craig. “Because of its shape, it’s easier to strike this one with your knees or elbows.”
There are also bags with contours that simulate an opponent’s body, making it easier to throw specific kinds of punches like uppercuts and body shots. However, unless you have a martial arts or boxing background, or you’re ready to invest in some expert coaching to learn good striking technique, Craig suggests restricting your workouts to throwing punches. “These other kinds of strikes are highly skilled movements, and you might hurt yourself if you don’t perform them properly.”
The term punching bag can encompass a variety of tools. The most prominent is probably the free-standing bag, which is basically a heavy bag that’s mounted to a base. They’re usually weighted down with sand or water, and can be rolled anywhere you want to place them, which makes them convenient to move and easy to set up in a home gym (especially if you can’t mount a heavy bag on your ceiling or wall). Free-standing bags usually spring back into place after you hit them, making them a good option to practice kicks on. Nevertheless, Craig isn’t a fan of bags mounted to a base because they can alter the footwork fundamentals needed to get in position to strike the target. These bags can slide and wobble on the floor when you hit them, changing your distance from and orientation to the bag throughout the workout. The dynamics of how they recoil can cause problems, particularly for a novice.
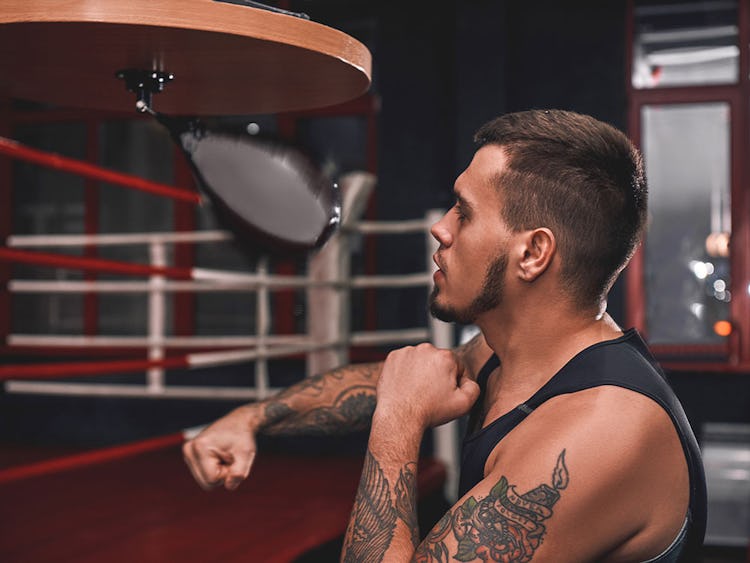
Speed bags are the small, ceiling-mounted, teardrop-shaped ones you’ve seen in videos of old-time boxers training (and all the Rocky movies where Stallone makes them rattle so fast you wonder if they sped up the tape in the editing process). Speed bags are great for improving reaction time, boosting hand-eye coordination, and, as the name suggests, developing punching speed, but they aren’t meant to be hit hard, and you don’t use the same striking technique you do for power punches. As they’re really a specialized tool for dedicated boxers, Craig says not to bother with a speed bag until you’ve gotten a heavy bag and mastered the boxing basics.
What Heavy Bag is Right For Me?
Back in the day, any boxing gym worth its salt would only have leather heavy bags. Though there are a bevy of man-made materials available now that all promise greater durability, Craig thinks good ol’ animal hide is still the way to go for longevity, quality, and feel. Generally, you’ll want a heavy bag that’s equal to about half your bodyweight. So, if a brand has three different weights available—say 75, 100, and 125 pounds—most adults should go with the middle option. As long as the bag doesn’t swing or shake dramatically with every blow you land, it’s offering enough resistance to provide a good workout. Heavy bags range in price depending on the size and material (leather, while more durable, is costlier than vinyl), but you can expect to spend more than $100.
Most bags come pre-filled, but you can save considerable money by buying an empty one and stuffing it yourself. Take a pair of scissors to some of your old T-shirts and shove those rags into the bag. However, bags can also be filled with sand, water, textiles, and air.
Not sure how to mount your bag? Check out this video from Fight Alex if you’re planning to anchor the bag to your ceiling, and this one if you’re going to affix your bag to a wall bracket instead.
What Do I Need To Work Out On A Punching Bag?
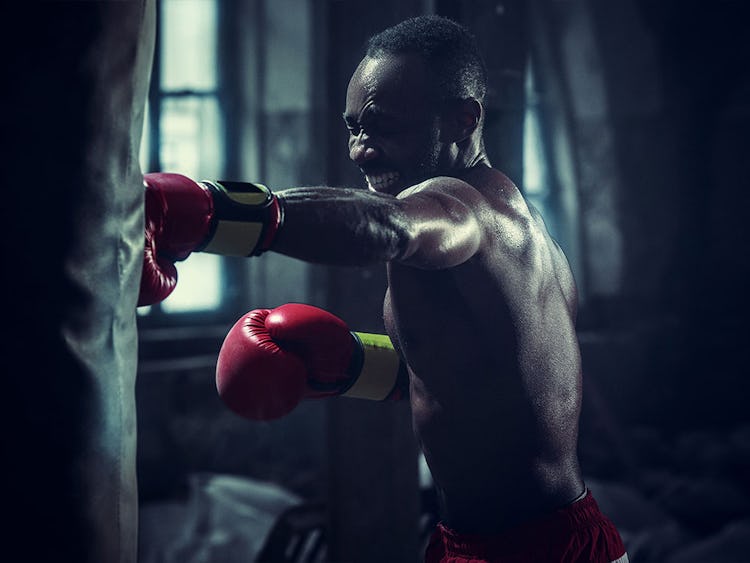
Hitting a bag with bare fists or workout gloves is about as dangerous as walking up to Mike Tyson and telling him he talks funny. If you’re going to train like a boxer, you need to go all in, and that means investing in gloves. Again, Craig recommends leather. Store sold out? Then synthetic leather is a good backup option. Get a 12 or 14-ounce pair, which are usually sold separately from a bag. Punching bags are often bundled with 16-ounce gloves, but Craig says those are more suited for sparring in the ring, and the weight of them will make your forearms and hands fatigue quicker when you try to pound the bag with them.
Gloves don’t just fit over your naked hands. Your fists have to be wrapped first to help stabilize them and prevent injury. Craig recommends cloth hand wraps that are at least 180 inches long each (they come in packs of two). Two other styles—quick wraps and elastic wraps—are also popular, but many people don’t like how the elastic feels on their hands. The old-school cloth wraps also absorb more moisture, keeping your hands dryer and reducing the risk of painful chafing. The one exception is if you’re always pushed for time, and scheduling your workouts is a challenge. In this case, quick or elastic wraps can help you start your heavy bag session without having to individually bundle up each paw like an Egyptian mummy.
Need specific brand recommendations? Of course, there’s Everlast, probably the biggest name in boxing equipment. But Craig also likes the Muay Thai kickboxing favorite Fairtex to supply a bag, gloves, and wraps, with INFIGHTSTYLE and Action Pro Gear also high on the list. Failing that, go with a classic boxing brand like TITLE or Ringside. If you can’t find the gear you need because every vendor is sold out, look on Craigslist, eBay, or, as sad as this is to say, a local gym that is going out of business. Check for wear and tear before you buy, and don’t feel bad about offering much less than what the seller is asking. Shrewd shoppers can pay as much as 50% less, and even get the stuff delivered free. People who sell fitness equipment see it as clutter (and often heavy, dirty, cumbersome clutter at that), and they’re usually desperate to get rid of it. Just tell them you can pay in cash, and you’ll take the gear right away. Ultimately, you’re doing them a favor, and they know it.
How To Stretch Before Hitting The Bag
Use the following warmup routine from Andrew Craig to prepare your body for a punching bag workout.
1 Reverse Lunge To Sumo Squat
Reps: 5 (each side)
Step 1. Step back with your right leg and lower your body into a lunge until your back knee is slightly above the floor and your front thigh is parallel to the floor.
Step 2. Pivot on your right foot as you turn your knee out and stay low, so that you end up in a sumo squat, facing 90 degrees to the right of where you started. Reverse the motion to return both feet to standing and facing front. Repeat on the opposite side.
2 Quick Feet Drill
Reps: 20
Step 1. Stand just behind a line on the floor with your feet shoulder-width apart and a bend in your knees.
Step 2. Step your right foot just over the line, and then the left foot. Step the right foot back behind the line, followed by the left. Each step over the line and back is one rep. Move your feet fast, minimizing contact time with the floor.
3 Scorpion Pushup
Reps: 4
Step 1. Get into pushup position with your hands shoulder-width apart. Tuck your pelvis slightly so that it’s perpendicular to the floor, and brace your core and glutes.
Step 2. Lower your body until your chest is about an inch above the floor. As you go down, raise your left leg off the floor and reach it up and behind you, and twist it toward the floor on the opposite side. Continue until you can tap the floor with the bottom of your foot.
Step 3. Press your body back up, uncoiling it and returning the leg to the floor. Repeat the pushup, lifting the right leg. Each pushup is one rep.
4 Wall Suplex
Reps: 2
Step 1. Stand in front of a wall, facing away from it, with feet slightly wider than shoulder width. Squat down halfway, and then extend your back, reaching overhead until you can touch the wall behind you with both hands.
Step 2. Drive your hands into the wall so it can support your weight, and brace your core. Walk your hands down the wall toward the floor as far as you can—if your lower back gets uncomfortable, stop.
Step 3. Walk your hands back up the wall and return to standing. That’s one rep.
5 V Up
Reps: 10
Step 1. Lie on your back on the floor and extend your arms overhead and behind you.
Step 2. Draw your arms forward in front of you while you perform a situp and simultaneously raise your legs. Your body should form a V shape at the top.
6 Quick Feet Drill
Reps: 20
Repeat the quick feet drill from above.
7 Scorpion Pushup
Reps: 4
Repeat the scorpion pushup.
8 Wall Suplex
Reps: 2
Repeat the wall suplex.
9 V Up
Reps: 10
Repeat the V up.
10 Switches
Reps: 20
Step 1. Stand with your right leg in front of a line and your left behind it.
Step 2. Quickly switch your feet back and forth. Each switch is one rep.
11 Scorpion Pushup
Reps: 4
Repeat the scorpion pushup.
12 Wall Suplex
Reps: 2
Repeat the wall suplex.
13 V Up
Reps: 10
Repeat the V up.
14 Jump Rope
Reps: Jump for 60 seconds
Step 1. Hold the rope with hands at hip level and stand tall.
Step 2. Jump over the rope with both feet, landing on the balls of your feet. You can land with both feet at once, or one at a time. Mix up your jumping styles as you become more comfortable.
The Beginner’s Punching Bag Workout
If you’re brand new to bag training, try this routine from Craig. It uses only punches, so the risk of injury is low, even if your technique isn’t solid.
If you’re unclear how each punching technique should be performed, here’s a quick guide to some boxing basics.
Stance. Stand with your feet about shoulder-width apart and legs staggered. If you’re right-handed, your left leg will be in front, and you’ll jab with your left hand while your right is reserved for power shots. If you’re a southpaw, stand with your right foot in front. You should feel balanced in your stance, and your hands should be held at the sides of your chin. Your chin is tucked, and your elbows are near your sides. At the end of every punch, return your hand to your chin immediately.
Jab. This is your main weapon—a quick, short punch done with the lead hand. Throw your front hand straight out, turning your knuckles toward the ceiling as your arm locks out. Your knuckles should point up just as the punch snaps to completion. Typically, the jab is done while taking a small step forward.
Cross. A power punch thrown with the rear hand. Drive through your rear foot, pivoting on the ball of the foot to turn your hips as you throw it. Again, turn your knuckles as the arm extends.
Hook. This is a swinging punch that can be done with either hand. Bend your elbow 90 degrees, and bring your arm up until it’s parallel to the floor. Twist your body, pivoting your foot to deliver the punch. The palm can face down, or toward you.
Uppercut. Once you’ve set up an opponent with jabs and crosses, you can often finish him/her with an uppercut to the chin or body. The movement is almost the same as the hook, but the punch comes on an upward trajectory. Shift your weight to the side that will throw the punch, and then throw it upward with your palm facing you and elbow pointing down.
On every punch you throw, let the first two knuckles of your hand (the index and middle finger knuckles) deliver the blow. Landing with the smaller knuckles will injure your hands. Try to stay relaxed as you’re moving with your hands up, and exhale forcefully as you throw each punch. Move your head from side to side when you throw punches.
Directions: Perform 6 rounds as directed. All rounds are 3 minutes, followed by 1 minute of rest (so set a timer!). Before you begin, wrap your hands, and use them for the first round of shadow boxing. Then put your boxing gloves on and use them for the rest of the workout.
Round 1: Shadow Boxing
With your hand wraps on, move around while you throw punches. Try to stay light on your feet and cut angles so your body is never square to your target. (You don’t need the bag yet; just box against an imaginary opponent.) Throw jabs, crosses, hooks, and uppercuts, and focus on your breathing while you warm up slowly.
Round 2: Build Drill on Bag
With your boxing gloves on, cycle through these four combinations on your heavy bag.
- Jab
- Jab, cross
- Jab, cross, hook
- Jab, cross, hook, cross
Jab, cross, hook
Jab, cross, hook, cross
– Take a second between each combo to address your stance and defense (hands up!). Don’t stay in one spot in front of the bag the whole round—move at angles, imagining the bag is an opponent you want to cut off from the rest of the ring.
– After the combinations, hit 20 quick, straight punches for speed, alternating hands, while standing right in front of the bag.
Straight Punches
– Now perform a burpee—squat down, shoot your legs back so you land in a pushup position, and then reverse the motion to stand back up.
– Repeat the combinations, straight punches, and burpee for the whole round. When there are 10 seconds left on the clock, fire off straight punches nonstop, alternating hands.
– When the round ends, do 5 burpees.
Round 3: Jab, Cross Combos
Cycle through the following combinations.
- Jab, cross
- Jab, jab, cross
- Jab, jab, jab, cross
– The cross always comes hard, but the jabs can have different cadences behind them. In the example below, a short dash indicates a quicker combination, while a longer dash represents a slower combination with a longer pause between strikes. Experiment with all of them, and make up your own.
- Jab-cross vs. jab—cross
- Jab-jab-cross vs. jab—jab-cross
- Jab-jab-jab-cross vs. jab-jab—jab-cross
– When there are 10 seconds left in the round, throw straight punches nonstop, alternating hands.
– When the round ends, do 5 burpees.
Round 4: Same-Side Hands
Alternate the following two combinations. You’ll do combo 1 with your rear hand and combo 2 with your lead hand.
Combo 1
- Rear uppercut
- Cross
- Hook
Combo 2
- Jab
- Lead hook
- Cross (this is the exception; use your rear hand to cross)
– When there are 10 seconds left in the round, throw straight punches nonstop, alternating hands.
– When the round ends, do 5 burpees.
Round 5: Slow to Fast, Fast to Slow
Throw 5 slow/soft punches on the bag with both hands and, immediately after the fifth punch, rip off 3 hard and fast punches.
– Without resetting, repeat the 5 slow punches and 3 fast punches. Continue for the duration of the round.
– When there are 10 seconds left, throw straight punches nonstop, alternating hands.
– When the round ends, do 5 burpees.
Round 6: 7-Second Drill
Stand close to the bag so you don’t have to step in for all your punches. For the first 7 seconds of the round, hit the bag as hard and fast as you can. Rest 7 seconds, and then repeat the drill till the end of the round.
– Keep your hands up even while you’re resting. Maintain a bend in your knees, and keep moving your head side to side.
– When there are 30 seconds left in the round, throw straight punches nonstop, alternating hands.
– When the round ends, do 5 burpees.
The Ultimate Heavy Bag Workout
This workout from Craig is for experienced strikers, and utilizes all weapons, meaning the hands, feet, elbows, and knees. Do not attempt it unless you’ve already had some instruction in kickboxing or Muay Thai.
Directions: Perform five rounds as directed. All rounds are 3 minutes, followed by 1 minute of rest.
Remember to practice defense and footwork. Don’t stand still between combinations. Keep your hands up, and use slips, rolls, and pulls (head movement) to evade counterattacks. Think about stepping out of range after every combo you throw. This will ensure you have to also step into your punches when initiating each combo.
Round 1: All Weapons
Work the following combinations for 30 seconds each.
- All punching combos
- All elbows
- Skipping knees
- Right kick
- Left kick
- Push kick
Elbows
Skipping Knee
Push Kick
– At the end of the round, throw a jab, cross, hook, cross with maximum power.
Round 2: Hook and Kick
Perform a lead hook, followed by a rear kick. Now throw a cross and then a switch kick. Let the switch kick land you in the opposite of the stance you started in.
Switch Kick
– Repeat the drill back and forth in both stances for the duration of the round.
– Vary your power output, and change the level of your kicks.
– At the end of the round, throw a jab, cross, hook, and cross with maximum power.
Round 3: Body Work
Cycle through the following combinations.
Combo 1
- Jab to the head
- Cross to the body
- Hook to the head
Combo 2
- Jab head
- Cross head
- Hook head
- Hook body
Combo 3
- Jab head
- Cross head
- Hook body
- Hook head
Combo 4
- Jab head
- Jab body
- Cross head
– At the end of the round, throw a jab, cross, hook, and cross with maximum power.
Round 4: Slip/Roll Drill
- Jab, cross
- Slip
- Cross, hook
- Slip
- Hook, cross
- Roll
– Repeat the combo, but replace the slips with rolls.
– At the end of the round, throw a jab, cross, hook, and cross with maximum power.
Round 5: 4 Series
- Jab, rear kick
- Jab, cross, switch kick
- Jab, cross, hook, rear kick
- Jab, cross, hook, cross, switch kick
– At the end of the round, throw a jab, cross, hook, and cross with maximum speed and power.
Circuit Training with Heavy Bags
A circuit is a series of exercises done back to back with little or no rest in between. Circuits get your heart rate up and keep it elevated, which improves conditioning, and they can burn a lot of calories in a short time. Perform the following circuit on the bag with your boxing gloves on.
Directions: Perform the first exercise for 30 seconds straight, and then rest 10 seconds. Then go on to the next exercise and do the same. Repeat until you’ve completed every exercise in the circuit, and then repeat the circuit for 5 total rounds.
1 Straight Punches
Hit the bag with a right-left-left-right combination with full power.
2 Kick Combinations
Alternate legs for the following kick combinations.
- 1 right kick
- 1 left kick
- 2 right kicks
- 2 left kicks
- 3 right kicks
- 3 left kicks
3 Alternating Jumping Lunge
Get into a lunge position and then explode upward, switching your legs in mid air and landing with the opposite leg in front. Immediately jump again and switch back. If you can jump high enough so that you have time to fire a knee strike at the top of the movement, do so.
4 Hooks On the Bag
Square yourself up to the bag and throw hooks in a right-left, left-right combination. Use full power—rip them!
5 Kick Combinations
Repeat the kick drills from #2.
6 Pushup with Shoulder Tap
Perform pushups, tapping your shoulder with the hand opposite to it at the top of each rep. So, do a pushup, and at the top, touch your left hand to your right shoulder. On the next rep, touch your right hand to your left shoulder.
Want more workout ideas? Skip the Instagram poseurs and check out “Bazooka” Joe Valtellini, Tony Jeffries, or Damien Trainor—all well-credentialed striking coaches.
What Should I Do for A Cooldown?
For your cooldown, end each bag training session with three minutes of slow and smooth shadow boxing. Keep moving your feet, and consciously slow down your breathing.


