Summary
– The bent-over barbell row is primarily a back exercise, but works many other muscles as well, and can be considered a full-body movement.
– The row can be used as an assistance exercise to strengthen weak points in specific lifts you want to improve.
– Rowing with a barbell can be hard on the lower back, so it may be wise to consider alternatives.
Bent-Over Barbell Row: How To Do It & Get Ripped
When most people hear “back exercise,” they picture a pullup, pulldown, or other such vertical pulling motion. There’s nothing wrong with that, but rowing should be the priority in your back training. Rows train the scapular muscles (the ones that control your shoulder blades) to retract, and that helps fight the bad posture people develop from sitting and looking down at their iPhones. They balance out the effects of pushups and chest presses on the shoulders, and they build thickness throughout the back.
Perhaps the greatest and most time-honored row of all is the bent-over barbell row. About as old as lifting itself, the bent-over row has you fighting to maintain a rigid torso in a hinged position while you pull the barbell to your belly. While it’s mainly used to build up the lats, rhomboids, and traps, the barbell row is really a full-body exercise, calling on the lower back, core, biceps, hamstrings and more. Let us take you through the proper execution of the exercise, its many benefits, and a few alternatives you can use to get similar results, if you determine the bent-over barbell row isn’t for you.
How To Do The Bent-Over Barbell Row
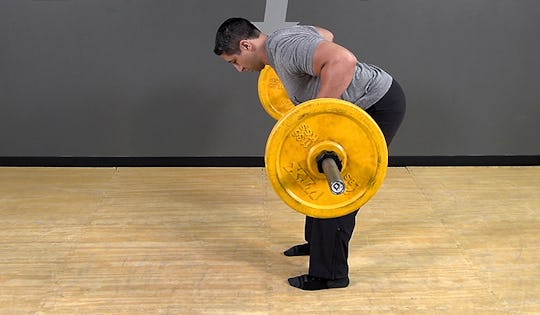
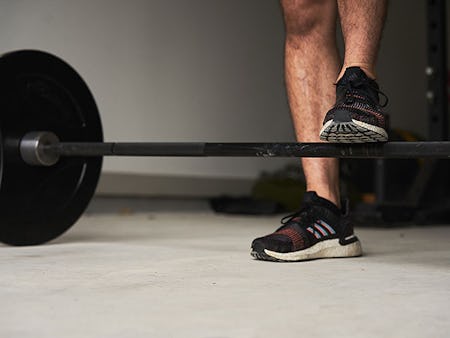
Step 1. Place a barbell on a rack set to hip level. (You can also deadlift it up from the floor—but only if you can maintain a flat back/neutral spine position, for safety). Grasp the bar with your hands just outside shoulder-width, and palms facing down. Pull the bar out of the rack. Step back, and set your feet at hip width; hold the bar at arm‘s length against your thighs.
Step 2. Draw your shoulder blades back and downward—think: “proud chest.” Take a deep breath into your belly, trying to expand it 360 degrees. Brace your core. Now bend your hips back while keeping your head, spine, and pelvis aligned. Allow your knees to bend naturally as you drive the hips back until your torso is just above parallel to the floor—or as low as you can go without losing the neutral positioning of your lower back. Your arms should hang straight down, but not loose; maintain your proud chest position and actively pull the bar close to you so it’s touching your shins just below the knees. Your neck should be neutral—not extended or rounded forward. Focus your eyes on the floor a few feet in front of you.
Step 3. Actively contract/squeeze your back muscles as you row the bar up to your abdomen. Breathe out as you do so. The bar should touch your torso somewhere between your belly button and sternum. Hold it there for a second or two, and then lower the bar back down under control, taking another breath in.
Because it lends itself to training heavy, the bent-over barbell row is usually performed for sets of 6 to 12 reps, but it can be done for higher rep ranges to train the endurance of the lower back and core. Those new to the exercise should start with 3–5 sets of 5 reps to keep fatigue at bay while they master the technique.
Safety Tips
Be careful not to let your torso bounce up and down as you’re rowing the bar, as this can cause a lower-back injury. Focus on keeping your trunk motionless, and your bar path smooth. Furthermore, don’t drive your elbows up as high as you can. This can irritate the shoulder joints over time. Your upper arms should point out at about a 45-degree angle at the top of the row, and they should be level with your torso.
Training Tips
The bent-over barbell row can also be performed with different grip widths and hand positions to emphasize one muscle group over another. For instance, the classic row described above is great for overall back development, but gripping the bar even wider and flaring the elbows more shifts the muscle activation so that the traps and rear delts do more of the work. Meanwhile, a narrower, shoulder-width grip will have you pulling the bar lower on your abdomen with your elbows tucked closer to your sides. This will train your lat muscles to a greater degree. Another option: use an underhand (palms facing up) grip, which puts more tension on the lats and biceps, but less on the traps and upper back muscles. Choose the variation that best suits your goals.
For example, a lifter who wants to strengthen his/her back to improve performance on the deadlift should use the basic barbell row described above as a mainstay. The mechanics are most similar to those used on the deadlift, so this type of row will have the greatest carryover. However, someone who is trying to build thicker, wider lats for physique development may do better to focus on the underhand-grip row with the elbows in close to the sides.
Pendlay Row
The bent-over row can also be done with a slightly different technique. A Pendlay row, named for Olympic weightlifting coach Glenn Pendlay, is a bent-over barbell row with a lower torso position that allows you to touch the plates on the bar (assuming you’re using standard-sized Olympic plates, or 45-pounders) to the floor between reps. This variation helps to build more explosive strength, as you can’t rely on momentum or the muscles’ stretch reflex to help you row the bar.
It also makes cheating a bit more difficult. Many people will inadvertently stand more upright mid-set when doing heavy rows, taking pressure off the lower back and using momentum to get the weight up. The Pendlay row makes you stay in that bent-over position, but it gives your lower back a break between reps, letting you re-set, and that may allow you to lift heavier. However, the Pendlay row requires a strong lower back and good hip mobility in order for you to bend over that far and keep the position without rounding your lower back, so we wouldn’t recommend it for inexperienced lifters, or those with lower-back problems.
Benefits of the Bent-Over Barbell Row
The bent-over barbell row is one of the most efficient exercises you can learn, as it trains a number of muscles and functions. Here’s a quick rundown of what we consider to be its key selling points.
#1. It trains the hip hinge. The ability to bend your hips back—activating your posterior muscles while keeping good alignment from your head to your pelvis—is a must for anyone who wants to be functionally strong or perform well at sports. A three-point stance in football, the beginning of any jump, and performing the simple action of picking a grocery bag up off the floor all require sound hinge mechanics. The bent-over barbell row teaches you not only to hinge but to hold that hinged position while you work the upper body. So, funny enough, while it’s thought of as a back exercise, it’s really a full-body, athletic movement.
#2. It works a ton of muscle. As you’ll see in the next section, the row trains pretty much the entire back side of the body, with some added stimulation for the biceps, forearms, grip, and core as well. If your workouts need to be brief, or you get overwhelmed by the idea of having to use a dozen different exercises to train all these muscles, the bent-over row can simplify things greatly. Additionally, the bent-over barbell row puts you in a strong biomechanical position and has you using both arms at once. That allows you to handle more weight than you could on most other back exercises. If lifting big weights—on any exercise—is a goal of yours, the bent-over row can help you get there.
A 2018 study looked at eight different exercises for efficiently targeting all the muscles of the back. The exercises were the bent-over barbell row, chinup, inverted row, IYT raise, lat pulldown, pullup, seated row, and suspension trainer row. The lead researcher concluded that if a person had to choose only one back exercise to do, the bent-over barbell row would be the best option, as it activates three of five main back muscles to the greatest degree (middle traps, infraspinatus, spinal erectors), and was the second best exercise for the other two muscles (lower traps and lats).
#3. It strengthens weak points. Some people struggle to keep the barbell close to their body when performing deadlifts or Olympic weightlifting exercises. The bent-over barbell row helps to strengthen the back so that you can maintain control of the bar, as well as rigidity in the torso and hips while in a hinged position. You’d be hard-pressed to find a weightlifter, powerlifter, or strongman who hasn’t used bent-over barbell rows to prepare for competition at some point.
#4. It promotes good posture. Most people slouch. Their shoulders are rotated forward and their upper backs are weak as a result. If you do a lot of chest pressing on top of that, you make the problem worse, and increase the risk of shoulder pain. Rows strengthen the upper back—specifically, the rhomboids and middle traps, which retract the shoulder blades. When these areas are strong, you stand up straighter with your shoulders back and your chest out—like a Marine standing at attention. In other words, rows make you look better, and avoid the disabled list.
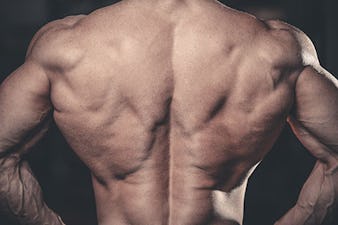
Muscles Used in the Bent-Over Barbell Row
You can expect the following muscles to be trained when you do the bent-over barbell row, starting at the top of the body and scanning down.
- trapezius (middle and lower portions)
- rhomboids
- latissimus dorsi (lats)
- teres major
- rear delts
- infraspinatus (rotator cuff)
- teres minor
- pec major (the sternal portion)
- brachialis (upper arm)
- biceps
- brachioradialis (forearm)
- spinal erectors
- quadratus lumborum (core)
- rectus abdominis (the six-pack muscle)
- obliques
- glutes
- hamstrings
- adductors
- quads
How To Stretch Before Doing the Bent-Over Barbell Row
Try the following warmup mobility drills from Cristian Plascencia and Natalie Higby, founders of thedurableathlete.com, before you perform the bent-over barbell row. Do 3 sets of 5–10 reps for each move.
Shoulder Protraction/Retraction
Kneeling Arm Thread
Cat-Cow
Half Mountain Climber to Full Mountain Climber
Alternatives to the Bent-Over Barbell Row
For all its good points, the bent-over barbell row does have a downside: it can be hell on the lower back, especially if you’re over 40, or have a history of back problems. Furthermore, just getting stronger on the barbell row over time makes it a bit more precarious for the lower back because you’re subjecting the lumbar spine to increasingly heavier loads. That’s why we love the bent-over row for beginners and younger athletes looking to build a base of strength, but rarely prescribe the standard barbell version to older people or those with banged-up backs. When you’re rowing 185 pounds, you’re not at much risk. But build up to where you can row 225 for reps, and you may find that your lower back wants to round, giving out before your lats and upper back do. For these reasons, it’s good to cycle alternative exercises into your program that work the same muscles as the barbell row, but in a less risky way.
Inverted Row
The inverted row is a rowing motion done while hanging from a barbell or suspension trainer. Like the bent-over row, it’s a full-body movement that requires your core to stabilize your body, but you don’t load your back in a hinged position, so there’s no stress on the lumbar. Done on a barbell, the inverted row is a bit more stable. When using a suspension trainer, you have to stabilize the handles and you get a little extra range of motion.
Step 1. Grasp the handles with your palms facing down, and hang from the suspension trainer at whatever angle is appropriate for your strength level. A steeper angle will make the exercise easier, and a flatter one will be harder. Just make sure there’s tension on the straps. Brace your abs and draw your shoulders back and down—think “proud chest.” Retract your neck, as if making a double chin, so your body forms a straight line from your head to your feet.
Step 2. Row your body up to the handles, tucking your elbows close to your sides, and rotating the handles so that your palms face each other.
One-Arm Dumbbell Row
Rowing with dumbbells is often preferable to a barbell. The dumbbell allows a greater range of motion, a freer range of motion—so that your body can determine the best path of movement based on your own mechanics—and it forces you to stabilize your torso to prevent rotation. It’s also great for building up grip strength, and it can be trained both heavy and for high reps. It’s a staple exercise in many strength athletes’ workouts, as well as those of bodybuilding and fitness competitors.
Step 1. Hold a dumbbell in one hand and get into a staggered stance, balancing on the ball of your rear foot with your opposite forearm braced against your front thigh for support. The hand holding the weight should be opposite of the foot that’s in front.
Step 2. Row the dumbbell to your hip, and then hold it in the top position for a second or two. Lower the weight under control.
)