

Summary
– Slouching and poor training habits lead to restrictions in shoulder mobility.
– Tight shoulders can make it difficult to press overhead safely, and limit the exercises you can perform. Lack of mobility can warp the technique you use on certain lifts, and hurt your ability to make strength gains.
– Shoulder mobility can be improved with several different stretches and exercises. If pressing overhead with a barbell or dumbbell is painful or problematic, pressing with a landmine, kettlebell, or steel club can serve as an alternative.
6 Great Shoulder Stretches and Mobility Exercises
Do your shoulders hurt? Chances are you’re reading this article because they do, and in that case, we want to welcome you to one of the most popular and prestigious clubs in all fitness and sports (please note the sarcasm).
Shoulder pain is everywhere. Researchers estimate that roughly 67% of people will experience it in their lifetimes, and if you lift weights, particularly at a competitive level, your shoulders are almost sure to take some bumps. According to a study in the British Journal of Sports Medicine, the shoulders are one of the three most injured areas among weightlifters and powerlifters. But endurance junkies aren’t off the hook either. The North American Journal of Sports Physical Therapy revealed that as many as 87% of competitive swimmers will suffer from shoulder problems at some point.
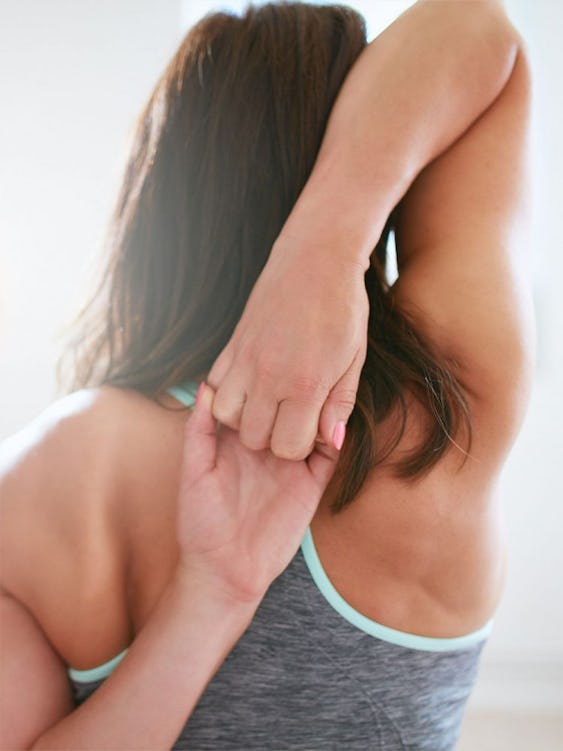
Maybe you don’t notice any pain yet, but if your shoulders ever feel tight, you find you can’t press overhead without your arms drifting in front of you, or you can’t reach behind your back without twisting your body or feeling a pinch, there’s a good chance the fuse is burning toward injury.
Consider any discomfort or tightness you feel a “check engine” light for your shoulder joints. If you don’t fix the underlying issue and you keep going HAM at the gym, something catastrophic could happen down the road, when you’re lifting heavy or playing sports. Let this guide introduce you to some stretches that can restore mobility to the shoulders, and exercises that can build shoulder strength and muscle as safely as possible. Get your membership in the Shoulder Pain Club revoked for life!
What Causes Shoulder Tightness?
Your shoulders were designed to move well. The main shoulder joint is the glenohumeral joint, and it’s one of the most mobile joints in the body, capable of many degrees of movement. (Think of swooping your arms in big circles… your hips sure can’t do that.) But, in the modern world, we rarely need to use the shoulder joint’s full range of motion by reaching overhead or behind us. We also sit a lot, slumped over a desk or in front of a TV. Lack of use and daily, prolonged time in poor postures encourages shoulder tightness.
“This can lead to a loss of motor control,” says Taylor Weglicki, DPT, of Trevor Kashey Nutrition. “Think about riding a bike. If you haven’t ridden for a while, you can still get back on and ride it. But you won’t necessarily be able to ride a technical, single-track trail with the same precision and fine motor control components you used to. So what happens with the shoulders is that if you’re not using all of the different possible planes of motion, your body just doesn’t prioritize maintaining and utilizing those motions.” The result: restricted and poor quality movement.
Then we head into the gym, usually skipping the mobility exercises and stretching we should do as a warmup, and hammer our shoulders on the bench press and other press variations. As the front deltoid and pectoral muscles get stronger, our shoulders tighten up even further—unless we take the time to work on stretching them, and include a good amount of upper back and rear deltoid work (think rowing variations, band pull aparts, and face pulls) to complement them.
Specifically, tight shoulders can result from weakness of the muscles that control the scapulae (shoulder blades), or poor scapular movement patterns. Sitting and slouching leads to tight lats and an inflexible thoracic spine—an inability to sit up straight like your mom used to tell you to. If you can’t properly extend your thoracic spine, you’ll have a tendency to push your arms forward when your press overhead, and that can put more strain on the shoulder joints when you lift.
Another shoulder-tightener most people don’t even think about is breathing incorrectly. Proper breathing has you engaging your diaphragm, expanding your abdomen while keeping your ribs down. This allows you to take full advantage of your lung capacity. But many people are what are known as chest breathers, relying on the muscles of the neck, chest, and shoulders to work harder than they should to draw in air. Their chests and shoulders elevate and their ribs flare on each breath in, and this tightens these muscles up. Becoming more aware of your breathing, and trying to breathe more into your belly, can help reduce tension throughout the upper body.
To gauge your current shoulder movement quality, Doug Kechijian, DPT, co-owner of Resilient Performance Systems, suggests you give yourself the following test.
Wall Overhead Reach
Step 1. Stand with your back against a wall and arms at your sides. Fully press your back into the wall—your low, mid, and upper back should all be flat against it.
Step 2. Maintain this flat position as you reach overhead, keeping your arms straight. Try to touch the wall with the back of your hands.
PASS: You can touch the wall with at least the tips of your fingers without having to peel any of your back from it to reach.
FAIL: You can’t touch the wall without your back peeling up, or you can only touch the wall by angling your arms outward in a V shape.
Benefits of Stretching Your Shoulders
Whether you failed the wall overhead reach test miserably or just missed the mark, any degree of restricted mobility makes it more difficult and risky to do an array of lifts that can not only benefit your shoulders, but also every other muscle in your body. Think: Push presses, overhead squats, clean and presses, and more. These all work your upper body, core, and lower body.
Restricted shoulder mobility can hold back your strength too. “Think of doing a kettlebell press,” says Natalie Higby, an Onnit Coach, and co-owner of The Durable Athlete (she also models the exercises below). “If your fist is stacked over your wrist, elbow, and shoulder, then it’s much easier to move more weight.” Good shoulder mobility allows you to achieve the proper body alignment on your exercises, and that leads to the greatest transfer of power from your muscles into the object you’re lifting.
If you epically failed the overhead reach test or can’t currently lift overhead, launch a full assault to unstick your shoulder joints. Do all six mobility exercises shown below daily. If you just barely failed, try all the drills to discover which one seems to work best for you, and work at that one. “People often lack awareness of how their shoulder joint functions and moves,” says Higby. “It’s key to figure out how your own body is connected and what works for it.”
Finally, if you passed the wall overhead reach test, give yourself a pat on the back. (Hey, you can actually reach far enough to do it!) But you should still integrate the following drills into your training anyway, as they will only reinforce and solidify good movement, keeping you strong and healthy.
Exercises to Improve Shoulder Mobility
Here are six of the best stretches and drills you need to practice for healthy, mobile shoulders.
1. Chair Hang
This move is Kechijian’s go-to. He’s found that it works for most people most of the time, and he treats clients ranging from Special Forces operators and professional athletes to desk workers. It’s a three-pronged assault on the most common causes of tight shoulders: tight pecs, tight lats, and an inability to breathe deeply while keeping your ribs down. Kechijian recommends doing it daily.
Directions
Step 1. Grasp a pullup bar with an overhand grip, hands shoulder-width apart (grip it with palms facing each other, if your bar has handles that allow it). Raise your knees up until your quads are parallel to the floor, and your hips and knees are at a 90-degree angle. You’ll look as if you’re sitting on a chair.
Step 2. Flex your glutes so your pelvis is slightly tipped upward, which will help keep your ribs down. (Your knees will raise higher, almost to your chest.) Hold the position and breathe deeply from your nose, filling your belly when you breathe in. Slowly, but forcefully, blow all the air out of your nose (you’ll really feel the stretch on the exhale). One deep breath in and out is one rep. Do 2–3 sets of 10 reps.
2. Scapular Four-Way Drill
Weglicki points out that a lot of shoulder restrictions can be traced back to weak scapular muscles. “The shoulder moves with the scapula. So the shoulder blade and arm have to work together in coordination with all that soft tissue in reaching overhead,” he says. “If all those parts aren’t playing together, you’re not going to be solid [with any overhead training you do].” This move teaches you to activate the muscles that control your shoulder blades, strengthens them, and is also easy to do at home or anywhere else you don’t have equipment.
Directions
Step 1. Get on your hands and knees as if about to crawl. Your hands should be directly under your shoulders and your knees under your hips.
Step 2. Draw your shoulder blades straight back, pinching them together, as you take a deep breath into your belly. Try to expand your stomach 360 degrees. Now spread your shoulder blades apart as you exhale, crunching your stomach in. Do 10 reps.
Step 3. Now begin moving your shoulders blades straight up and down, shrugging your shoulders and then depressing them. Breathe in on the way up, and out on the way down. Do 10 reps.
3. Chest Smash
Religious devotion to bench press Mondays is a surefire way to tighten your lats and chest—two muscle groups that, when tight, lock down your shoulders. “Rolling the muscles with a lacrosse ball or foam roller can help free up how high your arms can go overhead,” says Higby. It’s often ideal to do this right before a workout, to help restore range of motion. Then you can train in that range of motion for stronger, more efficient movement.
Directions
Step 1. Get a foam roller, softball, lacrosse ball, or any other firm but rollable object that can move around under your muscles. Lie facedown on the floor and put the object under your left pec. Now put as much of your weight as you can tolerate into the object without pain (the intensity should be around a 7 out of 10). Extend your left arm down by your side with your palm turned up to the ceiling.
Step 2. Raise your arm out and upward toward your head, turning your palm over to face the floor. You should feel your pec stretching against the tension created by the ball. Continue raising your arm until it’s overhead, and rotating your wrist, until your palm faces in again. Reverse the motion.
Step 3. Linger over any particularly sensitive areas, moving your arm back and forth until they relax a bit. Work the left side for 60 seconds, and then repeat on your right pec.
4. Lat Smash
Step 1. Lie on your right side, wedging the ball or roller under your right lat (the meaty part between your shoulder and ribs). Extend your right arm straight overhead, your palm facing the ceiling.
Step 2. Begin drawing your arm down in front of your chest, turning your palm toward the floor as you do. Reverse the motion. Repeat for 60 seconds, lingering over any especially sensitive areas. Switch sides and repeat.
5. Band Pull Apart
Some shoulder tightness, pain, and even a slumped posture is caused by weakness in the rear delts and upper back muscles relative to the pressing muscles. The band pull apart and face pull hit these areas all at once, which can balance you out, prop up your posture, and maybe even end your pain. Band shoulder work has been a staple among powerlifters for decades, as it works to offset heavy pressing.
Directions
Step 1. Hold a resistance band with an end in each hand, palms facing up. Extend your arms out in front of you so they’re parallel to the floor.
Step 2. Keep your arms straight as you draw them back to 90 degrees from your sides, pulling the band apart. (Your body should form a T in the end position). Avoid shrugging your shoulders as you pull—keep your shoulder blades down. Do 3 sets of 20 reps.
6. Band Face Pull
Step 1. Attach a resistance band to a sturdy object at about face level. Grasp the free end with both hands, palms facing down, and step back to put tension on the band with your arms extended. You may stagger your stance to help you balance.
Step 2. Pull the band to your forehead, spreading it apart as much as you can to get your hands back as far as possible. You should feel the exercise in your rear shoulders and upper back. Do 3 sets of 10–20 reps.
Bonus: T-Spine Mobilization
Sometimes people can’t get their arms fully overhead because their thoracic spine is too tight from slouching over a keyboard at the office or chest pressing at the gym, says Higby. By mobilizing this area, you’ll unlock your upper back, freeing your arms to move vertically.
Directions
Step 1. Stand with your knees slightly bent and feet hip- width apart. Lift your arms so they are parallel to the floor, bend your elbows, and flare your elbows out to the side so your fingertips touch in front of your upper chest.
Step 2. Rotate your body to the right, aiming to point your elbow to the wall behind you. Allow your right hip to twist with your shoulders. Extend your arm at the end of the range of motion, so your fingers are pointing behind you.
Step 3. Try to keep your right shoulder and arm pointing back as you squeeze your glutes and twist your right hip back to face forward. Then rotate your torso forward again and bring your hands together in front of you. Repeat on the left side. That’s one rep. Do 3 sets of 10–20 reps.
As you gain greater mobility, you’ll find that you’ll have an easier time doing pressing exercises, or that the irritation you usually get from these movements subsides—but don’t get impatient and go too heavy too soon. “Simply stretching into a range of motion doesn’t automatically gain you control of that new motion,” says Weglicki. “You won’t necessarily be able to lift and control loads in that range. You have to practice loading reasonably over time to build tolerance.”
Shoulder Exercise Alternatives
If your shoulders currently hurt when doing conventional pressing exercises, it’s best to avoid them while you work on restoring mobility and function. But this doesn’t have to mean laying off all shoulder work, or switching over to boring machine exercises. There are several exercises that train the shoulders through a long range of motion and can be loaded fairly heavy while at the same time carrying a low risk of aggravating joint problems.
Higby loves landmine presses for people with irksome shoulders. The landmine is a metal sleeve anchored to a base, and when the fat end of a barbell is loaded into it, it turns the bar into one long lever. Pressing in this manner moves the bar on a diagonal arc, so the load isn’t centered so squarely on the shoulder joint as it would be pressing straight vertically. It also drives upward rotation of the scapula, activating the muscles that safely anchor the shoulder blades to the rib cage. Landmine presses are perfect for people who want to train the deltoids but can’t press overhead. “When you press with a landmine, the angle of the load is friendlier,” says Higby.
Pressing with kettlebells, steel maces, and steel clubs is also great for building scapular control. Their loads are offset from the handle, which makes them difficult to balance. When you lift them overhead or in front of you, the weight wants to pull your shoulder blades apart or forward, so fighting to keep them locked down and back makes the area more stable. The stability you gain will translate to stronger overall pressing and pushing, and help to prevent injury. Offset-loaded tools also allow you to train rotation—an oft-neglected movement pattern—and really strengthen your grip. “You might be surprised how weak you are in certain areas when these tools expose it,” says Higby.
In the case of the kettlebell overhead press, the offset load actually helps to pull your arm back, in spite of any tightness you may have in your shoulders or back. This results in your pressing straight up with your wrist, elbow, and shoulder all aligned. In other words, just lifting a kettlebell teaches good form all on its own.
Standing One-Arm Landmine Press Directions
Step 1. Anchor the end of a barbell into a landmine device, wedge it into a corner, or slide it into the handle of a kettlebell that’s lying sideways. Load the other end of the bar. Bring the loaded end of the bar up to your left shoulder and stand with legs staggered. Draw your shoulder blades back and down (think: “proud chest). Extend your right arm to help you keep balance, and brace your core.
Step 2. Press the bar overhead. It won’t move straight up, but on an arc. Allow your shoulder blade to rotate upward as you press. Do 3 sets of 5–10 reps on each side.
Half-Kneeling Kettlebell Single-Arm Press Directions
Step 1. Get into a half-kneeling position with your right knee on the floor. Both knees should be bent 90 degrees and your torso should be upright. Hold a kettlebell in your right hand at shoulder level with your palm facing in. The weight should rest on your forearm and be in tight to your chest. Tuck your tailbone so that your pelvis is parallel to the floor, and brace your core.
Step 2. Press the weight overhead, rotating your palm to face forward at lockout. Keep your balance. Do 3 sets of 5–10 reps on each side.
Two-Handed Club Front Press Directions
Step 1. Hold a steel club with both hands, right hand on top, and stand with feet shoulder-width apart. Tuck your tailbone so that your pelvis is parallel to the floor, and brace your core. The club should be held close to your body, just above the right hip. Draw your shoulder blades together and down (“proud chest”).
Step 2. Press the club to arms’ length in front of you, until your arms are parallel to the floor. That’s one rep. Do 3 sets of 5–10 reps on each side.


