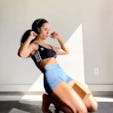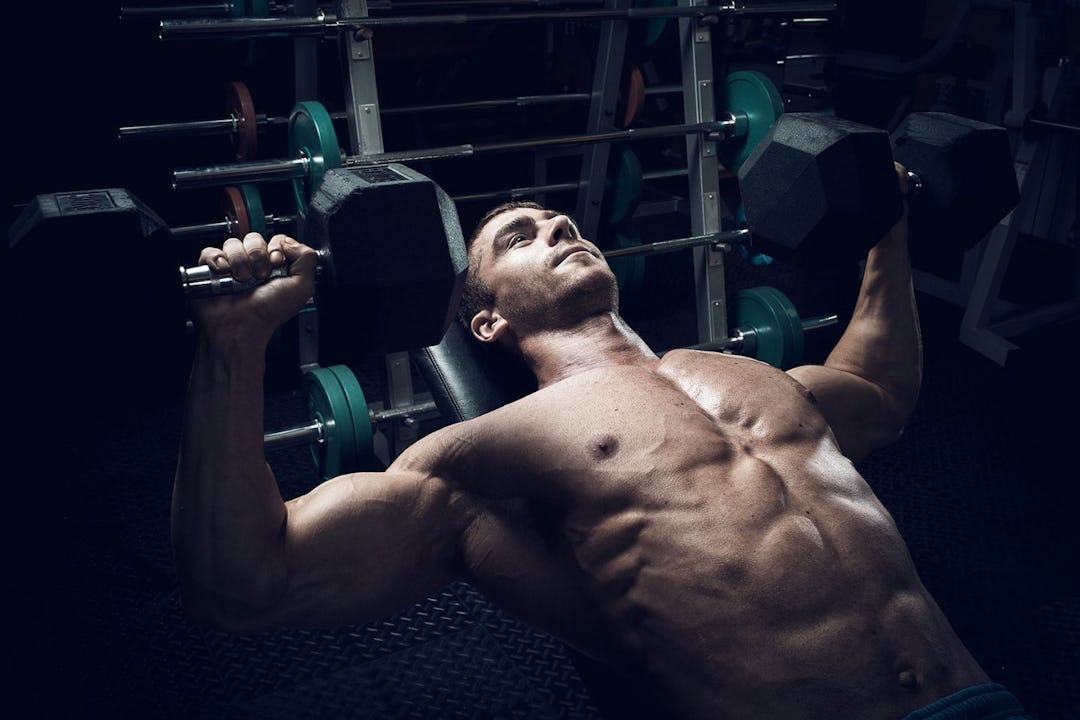
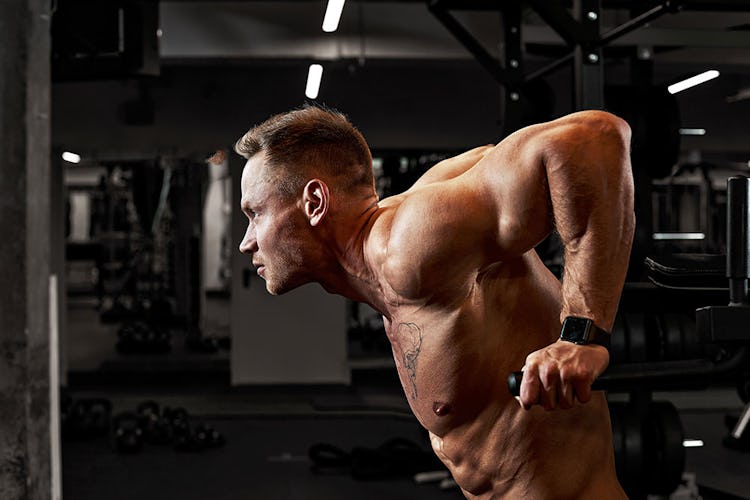
In an effort to be more time-efficient, some athletes like to train two or more muscle groups in a single workout. One of the most popular examples is a session that combines chest and back training. The pecs and lats/upper back pair about as well as a protein shake and a cold shower after a tough workout, offering a strategy to train nearly the entire upper body in short order.
We consulted a pro bodybuilder/strength coach to bring you the definitive guide to chest and back workouts—including three sample routines you can try. Whether you have aspirations of competing in a physique contest, you train at home with minimal equipment, or you’re just trying to make the most of a limited amount of workout time, you’re about to find the plan for building up your chest and back that’s right for you.
Can You Train Your Back and Chest Together?
“Chest and back make a great pairing because they’re antagonistic,” says Jonny Catanzano, an IFBB pro bodybuilder and owner of Tailored Health Coaching (@tailoredhealthcoaching on Instagram), “which means that while one is working, the other is resting.” This gives you the opportunity to speed your workout along by alternating sets for each muscle group with little or no time in between them, since there’s almost no fatigue that carries over from one to the other.
Imagine training only chest or only back by itself. You pick an exercise, do a set, rest, do another set, rest, and so on until your sets are complete, and then you go on to another exercise. There’s nothing wrong with this approach, but if you rest for two minutes or longer between sets (as the latest research suggests you should, if you want to maximize muscle gains), your workout time can easily extend to an hour or more—and you’ll have only worked one muscle area.
On the other hand, if you alternate sets of chest and back exercises, you can train both muscle groups at a much brisker pace. Your chest will recover while you work your back, and vice versa, so it’s possible to use shorter rest periods between each set and get your workout done in much less than an hour’s time—without rushing either muscle group’s recovery.
A study in the Journal of Strength and Conditioning Research had subjects perform three traditional sets of rows followed by three sets of the bench press, and, in another session, do the same routine again but with the back and chest exercises paired off and alternated. Researchers found that, when the lifters went back and forth between the two exercises in the second workout, they didn’t have to reduce the weights they were using as much from set to set. They were able to lift more total weight compared to when they did straight sets in the first workout—probably because each muscle got more rest before it was worked again.
Chest and back pairings are also great if your goal is fat loss. “You’ll burn more calories in a session training two big muscle groups together,” says Catanzano. “You’ll get your heart rate up higher than training one area at a time, and higher still if you decide to superset exercises.” That is, perform a set for chest and then one for back without any rest in between.
Furthermore, merging your chest and back training into one ensures that you’ll balance the work you do for each area. Many people (guys, mostly) will train chest voraciously, and then treat their back workouts as an add-on, doing only a handful of sets of lat pulldowns or rows. But if you plan to train both regions in a single session, you can easily keep track of the sets you do for one and match them with sets of the other.
If you’re interested in building strength, chest and back workouts will help you understand and focus on the relationship between a big back and a big bench press. “A stronger back lets you press more,” says Catanzano. “The lats help stabilize your torso when the bar is at your chest,” which is why many powerlifters do chinups or rows between sets of bench presses.
What Muscles Are Used?
Generally, when you’re talking about training chest and back together, you’re referring to the pectoralis major and minor (pecs), latissimus dorsi (lats), and upper back—comprising the rhomboids, trapezius, and teres major. The lower back—specifically, the spinal erectors—can certainly be trained as well, but many lifters prefer to work it on a lower-body day, as the lower back contributes automatically to squat and deadlift variations.
The deltoid muscles of the shoulders can’t help but get involved as well when you do any pushing and pulling, and the triceps assist on pressing exercises while the biceps and forearm/grip muscles work on your back movements.
Here’s a quick and very general anatomy course on where each of the chest and back muscles are located and what they do. (This isn’t a complete list, but these are the primary muscles you’ll target in a chest and back workout.)
Pectoralis major
This muscle has three heads and thus three different actions. The clavicular head, which runs from the collar bone to the humerus, raises the arm up and across to the other side of the body. The sternal head starts on the breastbone and reaches across to the humerus, so its fibers work to bring the arm around the front of the body. The costal head goes from the cartilage of the ribs and the external oblique muscle to the humerus, allowing the arm to pull downward from overhead.
Pectoralis minor
Lying underneath the pec major, the pec minor begins on the third to fifth ribs and attaches to the scapula (shoulder blade). It draws the tip of the shoulder downward, protracts the shoulder blade, and raises the ribs during inhalation.
Latissimus dorsi
The lat originates on the thoracic spine, lumbar spine, lower ribs, and iliac crest of the pelvis and connects to the humerus, just below the shoulder joint. It extends the shoulders, draws the arms to the sides, and helps with inhalation.
Rhomboid
A rhombus-shaped muscle (hence the name), the rhomboid runs from the cervical and thoracic spine to the scapula. It elevates and retracts the shoulder blade.
Trapezius
Like the pecs, the traps can work in three different directions. They start at the bottom of the back of the skull and the spine and reach over to the shoulder blade and collarbone in order to raise the scapula, retract it, and depress it.
Teres major
This is a small back muscle that assists the bigger ones. Originating on the back of the scapula, it inserts on the front of the humerus, and works to rotate the arm toward the body and draw it behind the body.
How Do You Set Up A Chest and Back Workout?
The way you combine chest and back exercises in a session is highly dependent on what you want to achieve. During his bodybuilding prime, Arnold Schwarzenegger liked to superset chest and back moves with little or no rest between them. For instance, do a set of incline presses followed immediately by a set of seated cable rows, rest a minute or two, and repeat. As we explained above, this a solid plan for speeding up your workouts and burning more fat, but it sets a pace that may be too intense for many people.
Research suggests that longer rest periods help you train with more challenging weights, thereby stimulating more muscle growth, so you could alternate chest and back moves with plenty of time between them—say, 90 seconds to two minutes downtime between your press and row—if muscle gain is your main priority.
There’s also no rule stating that you have to toggle between chest and back exercises. You could do all your chest moves first and then go on to back, or the other way around. “This may be better for less experienced trainees,” says Catanzano. “You won’t gas too early in the workout like you might if you were supersetting.” It’s also a good option if you want to zero in on one area at a time, giving your full attention to each one in turn, but without having to break them into two different workouts.
Finishing off one body part before you do the other may be wise if you see it as a weak point. Most people’s backs are underdeveloped, so doing all your back training when you’re fresh will let you work it with the greatest possible effort and focus. “If you have shoulder problems,” says Catanzano, “you might want to put back first, because it will warm up your shoulders and make your pressing feel smoother when you get to chest.” Yes, doing chest second may mean sacrificing some weight on your chest exercises due to fatigue, but if you’re dealing with cranky shoulders or other pressing-related injuries, learning to stimulate the muscles with lighter weight may be just what the doctor ordered.
How Many Chest Exercises and Back Exercises Should I Do?
The short answer to this question is roughly three to five moves for each muscle group per workout. For example, a typical old-school chest and back session might look like this:
1A Bench press
1B Bent-over row
2A Incline dumbbell press
2B Seated cable row
3A Dip
3B Chinup
(The exercise pairings can be alternated with rest in between sets, or superset without rest.)
But the right number of exercises for you depends on several factors. If you only have 30 minutes or less to train, you may have to cap your workout at two exercises per body part. On the other hand, if you plan on doing shoulder and arm work on a second upper-body day in the week, and therefore won’t be working chest and back again for another week, you may want to do more chest and back exercises to get enough volume in.
Volume is a major consideration when planning out any training program. A bodybuilder looking to fully stimulate every muscle will need to hit the chest and back from all angles, and that means more exercises and more sets. Whereas a busy professional who only wants to maintain strength and some athleticism can get by with much less work.
If you want the best muscle gains possible, research suggests you need a volume of 10–20 hard sets per muscle group, per week, to do the job. “I’d recommend a minimum of 10 sets,” says Catanzano, “and closer to 20 sets for weaker body parts.” All of these sets should be taken to within one to three reps of failure, he says—the point at which your reps slow down and you’re about to break form due to fatigue. As long as you keep these volume parameters in mind, the way you set up your workouts is really up to you.
Let the number of exercises you choose suit the volume of work you’re shooting for. For instance, if you’re aiming to do 10 sets for chest and back in a week, that could break down to five sets for each in two different workouts. This is a moderate and very doable amount of work for most people, and won’t put you at risk for overtraining. See below.
Chest & Back, Day I
1A Incline press, 3 sets
1B Chest-supported row, 3 sets
2A Cable fly, 2 sets
2B Straight-arm pulldown, 2 sets
Chest & Back, Day II
1A Dumbbell bench press, 3 sets
1B Inverted row, 3 sets
2A Dip, 2 sets
2B One-arm dumbbell row, 2 sets
You could finish each session with some shoulder and/or arm work for a complete upper-body workout, or leave the gym after chest and back alone if that’s all you have time for, or you plan to work those other muscles on a different day.
If back is a weak point, you should emphasize it with more volume. In this case, you could do 10 sets for it on Monday, and then another six sets on Friday for 16 total sets that week.
Chest & Back, Monday
1. Machine row, 3 sets
2. One-arm lat-pulldown, 3 sets
3. Seated cable row, 2 sets
4. Chinup, 2 sets
5. Dumbbell bench press, 3 sets
6. Feet-elevated pushup, 2 sets
Chest & Back, Friday
1. One-arm dumbbell row, 2 sets
2. Wide-grip lat pulldown, 2 sets
3. Dumbbell shrug, 2 sets
4. Machine press, 2 sets
5. Cable fly, 3 sets
Chest & Back Workout Tips
Catanzano offers some of the following pointers to help you get the most out of your training.
- If muscle size is your main goal, the amount of weight you’re lifting isn’t as important as taking your sets near to failure and using exercises that best recruit the target muscles. Catanzano says the barbell bench press is overrated for pec gains. Let the majority of your chest training come from dumbbell, machine, and cable work, which is easier on the joints and can allow you to work the muscles through greater ranges of motion and with better isolation. The same goes for back training.
- If you’re over 40, or trying to work around injuries, the way you sequence your exercises is extra important. Rather than starting with your heaviest lifts, begin sessions with dumbbell or machine work and put moves like the bench press and bent-over row later in the workout when you’re fully warmed up and mobile. “You could do a dumbbell row and dumbbell bench press first,” Catanzano says, “and then go into bent-over rows and barbell bench. Or, you could do flys before bench presses, and chest-supported rows before bent-over rows or rack pulls.” Your joints will thank you.
- If strength is a big priority for you, however, and you’re sure your body can handle it, you can sequence your workouts the opposite way. Do your heavy work like bench presses first, when you can give them your best effort, and then move on to lighter dumbbell and bodyweight work afterward.
- Cycling your rep ranges can help you avoid plateaus and hit big PR’s on your exercises. Catanzano likes to use three-week cycles, performing sets of 12–15 reps the first week, 8–12 the second, and 6–8 the third. Then he repeats the process. “You need to hit all rep ranges to maximize gains,” he says.
How To Stretch Before Doing Chest & Back
Prepare your chest and back muscles for a workout by first reducing the tension in them with some light rolling on a ball or foam roller—sometimes called a “smash.” This will help you access greater ranges of motion in your exercises; it also drives blood into the muscles to warm them up.
Chest Smash
Place the ball or roller against your pec muscles, right under your collarbone between your shoulder and breastbone. Allow your body to rest on the ball just enough to apply moderate pressure to the muscle—it shouldn’t hurt. Roll an inch or so in each direction, lingering over any positions where you feel the most tenderness, until they release. You can also extend your arm, reaching it overhead with palm facing up, and then taking it down to your hip while rotating your wrist as shown, to increase the stretch on the muscles in different ranges. Perform the smash for about a minute on each side.
Lat Smash
Place the ball or roller under your shoulder and into the meaty muscle on the side of your back (your lat). Lie on your side and apply gentle pressure to the muscle as your reach your arm overhead and out in front of you, rotating your wrist as shown. Perform the smash for about a minute on each side.
After you’ve rolled, perform the following mobility drills to further activate the muscles you’ll train. Do 2–3 sets of 5–10 reps for each exercise. Rolling and mobility drills are courtesy of of Cristian Plascencia and Natalie Higby, owners of The Durable Athlete (@durable.athlete on Instagram).
Cat-Cow
Step 1. Get on all fours with your hands under your shoulders and knees under your hips. Brace your core.
Step 2. Press into the floor, spreading your shoulder blades apart as you round your mid back toward the ceiling. Make sure only your mid back moves—the lower back should be neutral and braced.
Step 3. Pinch your shoulder blades together again as you extend your spine back to neutral.
Sky Reach To Arm Thread
Step 1. Get on all fours with your hands under your shoulders and your knees directly beneath your hips. Brace your core.
Step 2. Draw your right arm up and across your chest as you twist your right shoulder toward the ceiling and reach overhead. Be careful to keep your hips facing the floor.
Step 3. Reverse the motion, reaching your arm across your body and behind the support arm. Twist as far as you can, ideally until the back of your right shoulder touches the floor. Complete your reps on that side, and then switch sides and repeat.
Banded Shoulder Circles
Step 1. Stand holding an elastic exercise band (or dowel) with both hands outside shoulder width. Draw your ribs down, tuck your pelvis so it’s parallel to the floor, and brace your core.
Step 2. Keeping your arms straight, raise the band over and behind your head as far as you can. Reverse the motion to bring the band back in front of you.
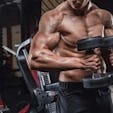
The Best Chest & Back Workouts
Catanzano wrote up the following workouts, each with a different user in mind. One is ideal for the lifter who has access to a well-stocked gym, complete with free weights and machines. The second one is for the guy or gal training in a bare-bones home gym—a barbell, dumbbells, bands, and your bodyweight are all that’s needed. Lastly, there’s a workout for targeting common physique weak points—the upper chest and lower lats.
Choose the one that suits you best for now, and bookmark this article to refer back to the others. You may need them in the future!
Directions
For each of the workouts, follow the rep prescriptions below for every exercise. They will change weekly. Repeat the workouts for 6–8 weeks.
Week 1: perform 12–15 reps for each exercise.
Week 2: 8–12 reps.
Week 3: 6–8 reps.
Week 4: Repeat cycle.
Begin with 2–3 working sets for each lift (sets that aren’t warmups), and add volume over time. You can build up to 4–5 sets for some of the exercises, and consider having an additional chest and back day in the week to further increase the volume. If you consider either chest or back a weak point, aim to eventually perform 15–20 sets for it per week.
Remember that when chest and back exercises appear back to back, you can pair them off and alternate sets of each, with or without rest between them.
Videos are courtesy of Jonny Catanzano, @jonnyelgato_ifbbpro on Instagram.
Full-Gym Chest & Back Workout
1. Bench Press
Step 1. Set up with the bar just over your eyes. Make sure that your feet are flat on the floor and your shoulders, back, and butt maintain contact with the bench. Arch your back, drawing your shoulder blades back and down. Grasp the bar with hands just outside shoulder-width apart (you may have to slide them an inch or two in either direction), so that when you lower the bar to your chest, your elbows make a 90-degree angle.
Step 2. Unrack the bar and hold it over your chest. Lower the weight to your chest, tucking your elbows about 45 degrees to your sides. After touching your chest, press the bar back to the starting position.
2. Incline Dumbbell Press
Step 1. Set an adjustable bench to a 30–45-degree angle, grasp a pair of dumbbells, and lie back on the bench, making sure your entire back is in contact with it—do not arch your back so that it causes your lower back to rise off the pad. Start with the dumbbells just outside your shoulders, elbows bent, and your forearms/wrists angled slightly (a V-shape).
Step 2. Keeping your elbows pointing at about 45 degrees, press the dumbbells straight up. Lower the dumbbells back down under control, until they’re just above and outside your shoulders.
3. Clavicular-Head Fly
Step 1. Attach single-grip handles (D handles) to two facing pulleys at a cable station set at shoulder height. Grasp the handles with hands angled 45 degrees and palms facing each other. Step forward so that your arms are extended at your sides, and there is tension on the cables.
Step 2. Keeping a slight bend in your elbows, bring your arms together in a wide arcing motion. Lower the weight under control until you feel a stretch in your chest.
4. Machine Low Row
Many gyms have a Hammer Strength low row machine, as shown here, but if yours doesn’t, try to mimic the exercise on a similar row machine, or set up an incline bench at a cable station.
Step 1. Adjust the seat of the machine so that, when you sit on it, the middle of your chest rests against the pad. Sit at the machine, brace your core, and bend at the hips—while keeping a long spine—until your chest is against the pad. Don’t let it come off the pad at any point during the exercise. Grasp the handles with a neutral grip (palms facing each other). Place your feet on the floor, and make sure your knees are out of the path of your arms when you row.
Step 2. Draw your shoulder blades down and together as you row the handles past your ribs. Be careful not to shrug your shoulders, and keep your chin tucked (don’t let your neck stretch forward).
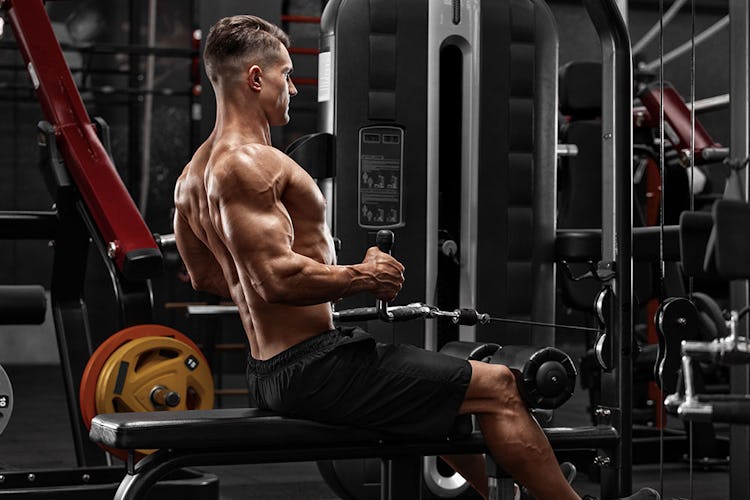
5. Mid-Back Cable Row
Step 1. Set an adjustable bench to a 45-degree angle, and place the bench in front of a cable station with two side-by-side pulleys. Set the pulleys on the lowest level, and attach a single-grip handle (D-handle) to them. Rest your chest against the bench and grasp the handles with arms extended. Make sure you’re far enough away from the machine to feel a stretch on your back. Arch your back and brace your core.
Step 2. Drawn your shoulder blades back and down as you row the handles to the outsides of your chest, flaring your elbows about 60 degrees. Lower the weight with control.
6. Block Pull
Step 1. Rest the bar on blocks or mats so that it sits just below knee level. Stand with your feet hip-width apart. Bend your hips back to reach down and grasp the bar, hands just outside your knees. Take a deep breath into your belly and brace your core. Pull your shoulders back and down—think about trying to bend the bar around your legs like a pretzel; this will help you activate the right muscles. You can use straps, as shown, to support your grip.
Step 2. Keeping your head, spine, and hips aligned, drive your heels into the floor and pull the bar up along your shins until you’re standing with hips fully extended and the bar is in front of your thighs. Lower back to the floor under control.
At-Home Chest & Back Workout
1. Landmine Suitcase Row
Step 1. Load a barbell into a landmine unit, or wedge one end into a corner. Load the other end of the bar with weight, and stand behind the plates, both feet on one side of the bar. Keeping a long spine with your core braced, bend your hips back to reach down and grasp the bar. Your torso should be about 45 degrees.
Step 2. Draw your shoulder blade back and down as you row the bar the bar, stopping when your elbow reaches the middle of your torso. Lower back down under control. Complete your reps, and then repeat on the opposite side.
2. Incline Dumbbell Press w/ Neutral Grip
Step 1. Set an adjustable bench to a 30- to 45-degree angle and lie back against it with a dumbbell in each hand at shoulder level. Turn your palms so that they face each other, and your elbows are tucked at about 45 degrees to your sides.
Step 2. Press the weights overhead to lockout, and lower them with control.
3. Chest-Supported Dumbbell Row
Step 1. Set an adjustable bench to about a 60-degree angle and lie down with your chest against it. Your spine should be long and your core braced. Grasp dumbbells with your arms extended, and allow your shoulder blades to spread apart while the weights hang at arm’s length.
Step 2. Row the dumbells to your sides, drawing your shoulder blades back and down. Lower under control.
4. One-Arm Band Press
Step 1. Attach a band to a sturdy anchor point at shoulder level behind you, and grasp the free end in one hand. Hold the band at chest level with your arm angled about 45 degrees from your torso. Step away from the anchor point to put tension on the band.
Step 2. Press the band in front of you to face level. Lower under control. Complete your reps, and then repeat on the opposite side.
5. Low-Lat Row w/ Band
Step 1. Attach a band to a sturdy anchor point overhead, and set up an adjustable bench behind it at a roughly 60-degree angle. Grasp the band in one hand and brace yourself on the bench with the opposite hand and knee. The working arm should be angled 120–150 degrees from your torso (i.e., if your arm hanging at your side is at zero degrees, and your arm extended in front of your chest is 90 degrees, the exercise should be done with your arm 30–60 degrees above that).
Step 2. Row the band down to your hip, stopping when your elbow is in line with your torso. Control the motion as you extend your arm again. Complete your reps, and then repeat on the opposite side.
6. Incline Dumbbell Fly
Step 1. Set an adjustable bench to a 30- to 45-degree angle and lie back against it with a dumbbell in each hand at shoulder level. Turn your palms so that they face each other, and your elbows are tucked at about 45 degrees to your sides. Press the weights overhead.
Step 2. Keeping a slight bend in your elbows, lower your arms slowly in a wide arcing motion until you feel a stretch in your pecs. Bring your arms back up in an arc until they’re overhead again.
7. One-Arm Dumbbell Row
Step 1. Place one knee on a flat bench and brace yourself with the hand on the same side. Your spine should be long and your core braced. Grasp a dumbbell at arm’s length.
Step 2. Draw your shoulder blade back and downward as you row the weight to your side with your elbow flared out about 45 degrees. Lower the weight under control. Complete your reps, and then repeat on the opposite side.
8. Deficit Pushup
Step 1. Place blocks or mats on the floor, or pile some weight plates as shown, so you create an elevated surface for your hands to rest on. Get into pushup position. Your body should form a straight line, with your pelvis slightly tucked so that it’s perpendicular to the floor. Brace your core.
Step 2. Lower your body between the blocks or plates until you feel a deep stretch in your chest, but don’t lose your pelvic position. Press back up.
9. T-Bar Row
Step 1. Load a barbell into a landmine unit, or wedge one end into a corner. Load the other end of the bar with weight, and stand behind the plates, feet straddling the bar. Grasp a V-grip handle (as used with cable stations) and, keeping a long spine with your core braced, bend your hips back to reach and hook the handle onto the bar. Allow your knees to bend. Grasp the handle with both hands, palms facing each other. Maintain your long spine and tight core as you pick the bar off the floor.
Step 2. Draw your shoulder blades back and down as you row the bar the bar, stopping when your elbows reach the middle of your torso. Lower back down under control.
Upper-Chest & Lower-Lat Workout
If you’ve been training a while, you’ve surely noticed that some of your muscle groups aren’t developing as well as others. When it comes to the chest and back, the upper portion of the pecs and lower section of the lats are commonly the weakest areas. Filling out the upper pecs will make your chest look bigger overall, and developing the lower lats will make your back appear wider (which makes your waist look smaller by default).
While you can’t isolate these areas completely, you can bias them with certain exercises and technique tweaks. Catanzano says that any row done with a neutral (palms facing in) grip and bringing the elbows tight to the side of the body—and stopping when the elbows are in line with the torso—will emphasize the lats over the upper back. To zero in on the lower-lat fibers (sometimes called the iliac lats, because they originate on the iliac crest of the pelvis), you need to perform pulling motions with your arm over and a little in front of your head (120–150 degrees of shoulder flexion), and driving your elbow toward your hip.
To attack the upper chest, you need to isolate the clavicular pec fibers as much as possible. The arm path to do this is similar to the one that trains the lower lats, but, of course, the resistance comes from the opposite direction. Incline presses and flys are the typical exercise choices, but make sure you perform them with a neutral grip and elbows tucked, so that your arms travel the same direction that the clavicular fibers run.
1. Incline Dumbbell Press
Step 1. Set an adjustable bench to a 30–45-degree angle, grasp a pair of dumbbells, and lie back on the bench, making sure your entire back is in contact with it—do not arch your back so that it causes your lower back to rise off the pad. Start with the dumbbells just outside your shoulders, elbows bent, and your forearms/wrists angled slightly (a V-shape).
Step 2. Keeping your elbows pointing at about 45 degrees, press the dumbbells straight up. Lower the dumbbells back down under control, until they’re just above and outside your shoulders.
2. Chest-Supported Low-Lat Row
Step 1. Rest your chest on an elevated bench, high enough so that your arms can hang straight down while your body is parallel to the floor. Keep a long spine and your core braced. Grasp a dumbbell in each hand.
Step 2. Draw your shoulder blades down and back as you row the weights to your sides.
3. Clavicular-Head Pec Fly
Step 1. Attach single-grip handles (D handles) to two facing pulleys at a cable station set at shoulder height. Grasp the handles with hands angled 45 degrees and palm facing each other. Step forward so that your arms are extended at your sides, and there is tension on the cables.
Step 2. Keeping a slight bend in your elbows, bring your arms together in a wide arcing motion. Lower the weight under control until you feel a stretch in your chest.
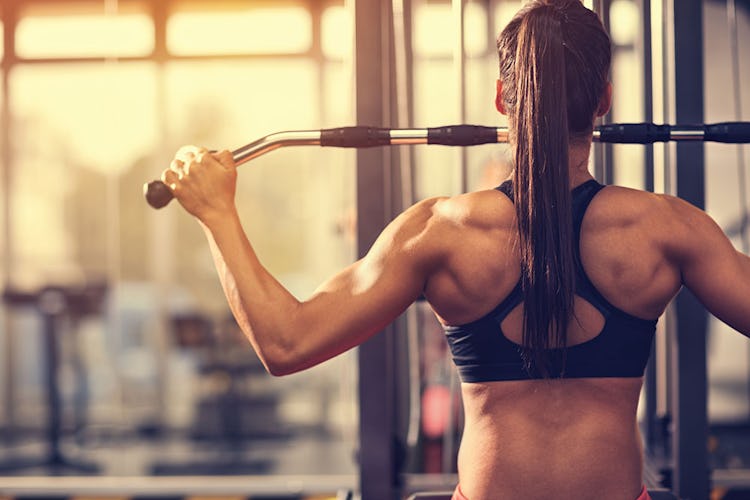
4. Incline Low-Lat Pulldown
Step 1. Set an adjustable bench at about a 60-degree angle in front of a cable station. Attach a bar to the pulley at the highest setting, and then attach single-grip handles to the bar so that you can grasp them with palms facing in. Lie with your chest against the bench and your arms extended overhead. Keep a long spine, and your core braced. There should be tension on the cable to start.
Step 2. Draw your shoulder blades back and together as you row the handles, stopping when your elbows are at your sides. Lower the weight under control.
5. Close-Grip Incline Press
Step 1. Set an adjustable bench to a 30–45-degree angle and lie back on it. The bar should be just over your eyes. Make sure that your feet are flat on the floor and your shoulders, back, and butt maintain contact with the bench. Arch your back, drawing your shoulder blades back and down. Grasp the bar with hands about shoulder-width apart.
Step 2. Unrack the bar and hold it over your chest. Lower the weight to your chest, tucking your elbows about 45 degrees to your sides. The bar should touch the upper portion of your chest, just under the collarbone. Press the bar back to the starting position.
6. Rack Pull
Step 1. Set the bar on blocks or the spotter bars of a power rack, as shown, so that it sits just above knee level. Set up as you did for the block pull above—long spine, shoulders packed down and positioned directly over the bar, and core braced. Actively pull the bar tightly into your body, and maintain this tension throughout the rep. You can use straps, as shown, to support your grip.
Step 2. Extend your hips to lockout, standing up tall, and then lower the bar back under control.
Need more upper-chest training? See our guide to upper-chest workouts.
Like what you're reading? You'll love a FREE trial of some of our top products. Get more out of your workouts and daily life.
Learn More Here